

Wondering how to make a private role in Discord? Look no further than this article.
Discord is a popular instant messaging app and VoIP social platform with millions of active users from all across the world. The platform is widely used by gamers to communicate and collaborate with their fellow gamer friends.
In this article, we will provide a detailed, step-by-step guide explaining “How to make a private role in Discord”
So, without any delay, let’s dive right into it.
How to make a private role in discord
While Discord can be a great way to build online communities, some people like to keep their channels private so that only the assigned members can access them. One way to achieve this is to make a private role in Discord.
Here’s how can do this in 4 simple steps:
- Turn off all permissions for @everyone
- Create a new role within the server
- Turn on permissions for the newly created role
- Assign the role to specific members within your server
1. Turn Off All Permissions For @everyone
First things first, you need to disable all permissions for @everyone. Here’s how:
- Step 1: Click on your Server followed by clicking on Server Settings
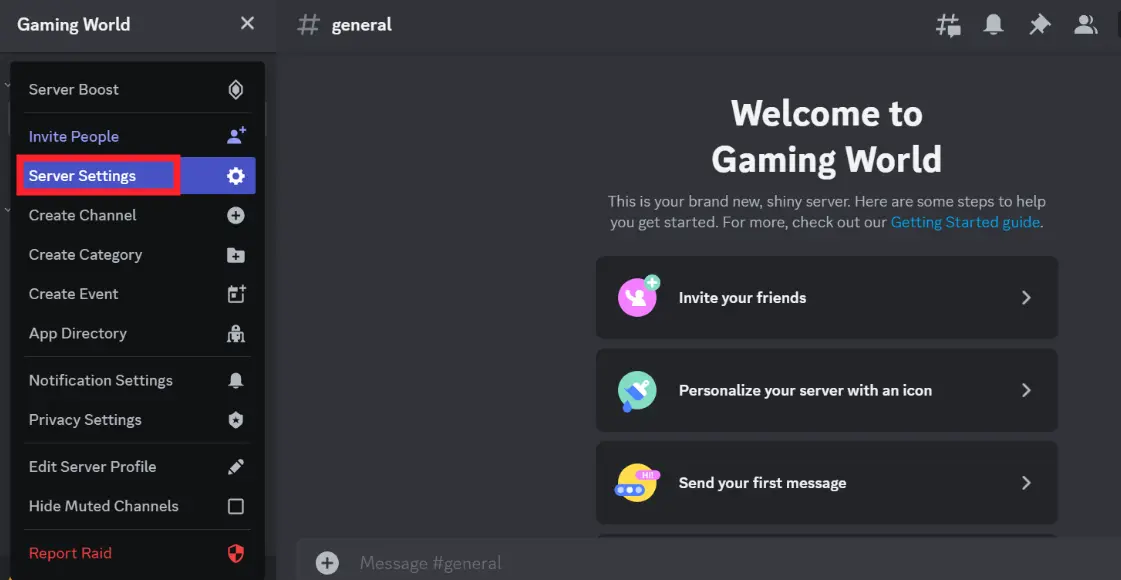
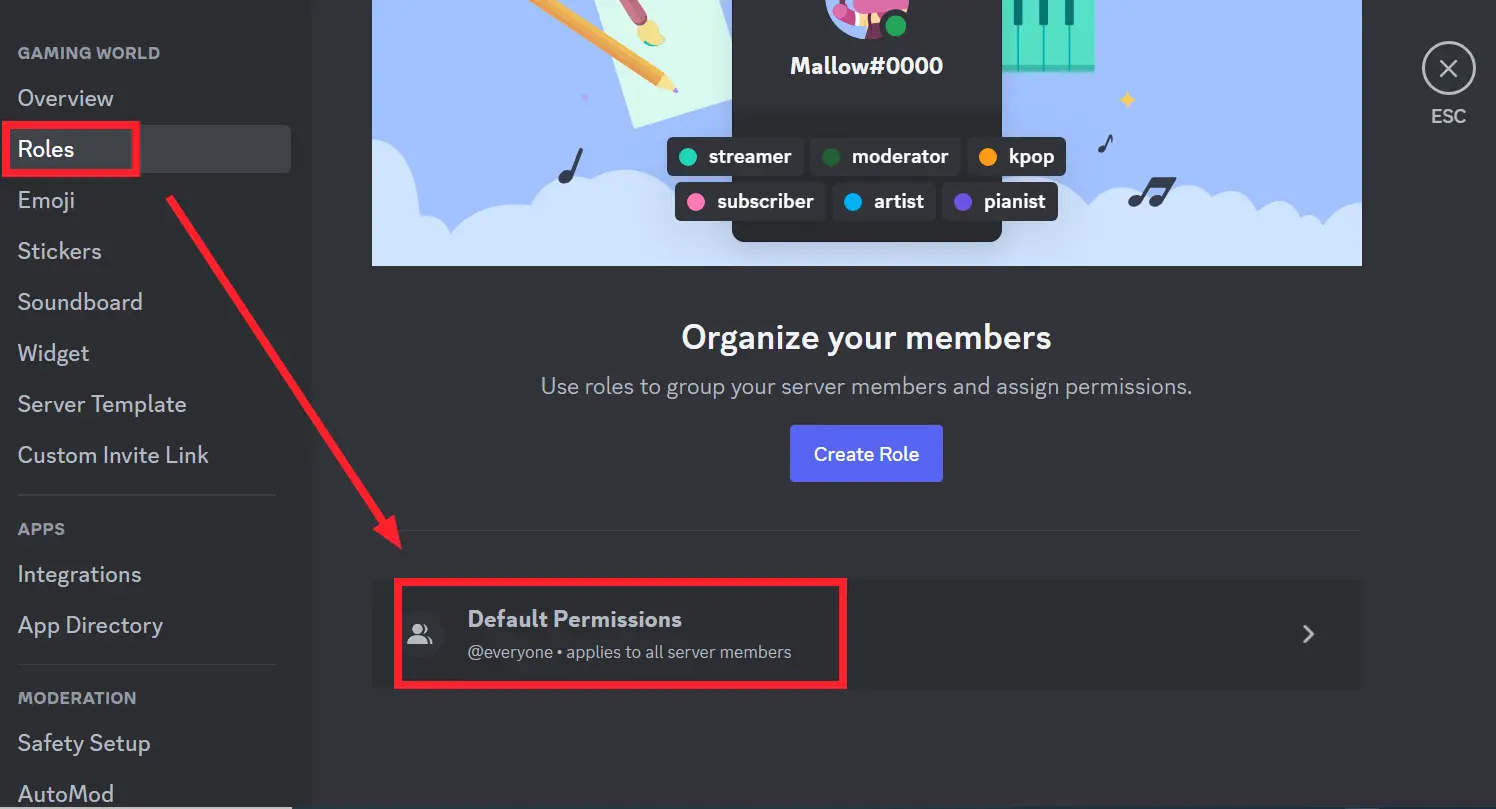
- Step 2: Then, go to the Roles Tab and click on Default Permissions
- Step 3: Now, click on Clear Permissions
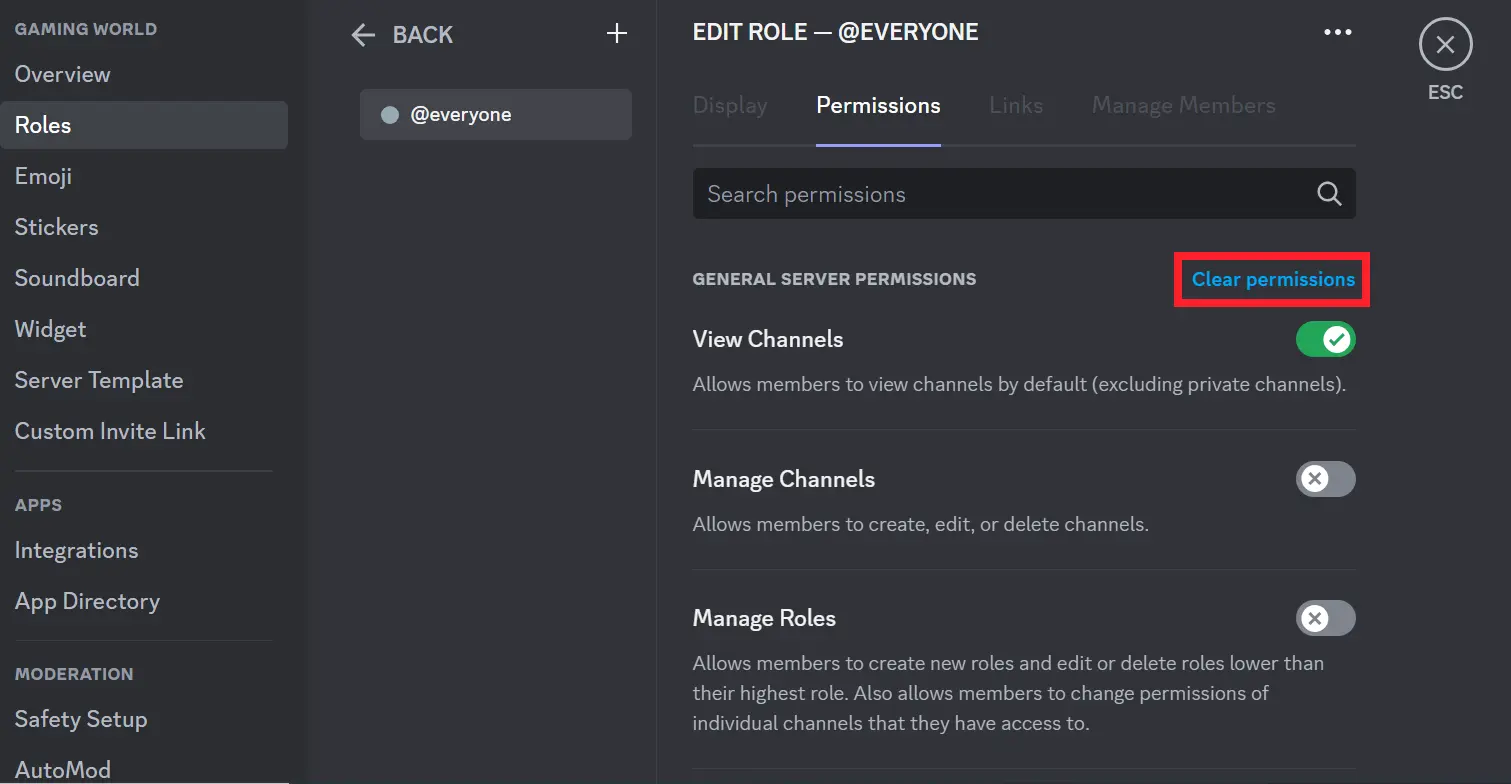
- Step 4: Lastly, hit Save Changes
NOTE: If you’re using Discord on mobile, you might not get the clear permission button. In that case, you’ll need to manually switch off the toggle for all the permissions.
2. Create A New Role Within The Server
The next step on the list is to create a new role within your server. Here’s how:
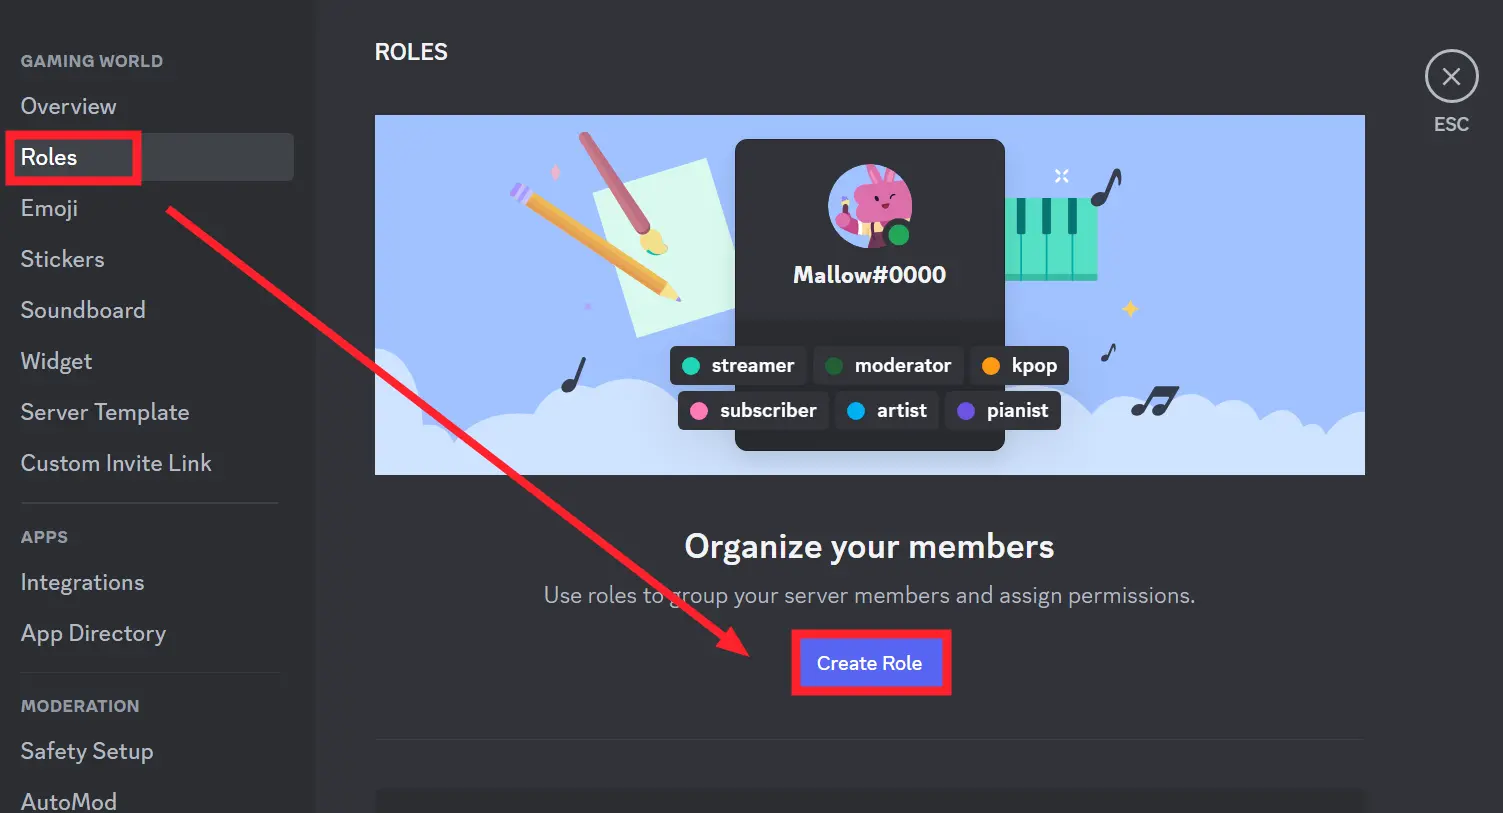
- Step 1: Within the Roles Tab, click on Create Role
- Step 2: Enter your Role Name
- Step 3: Choose a Color and an Image if you want
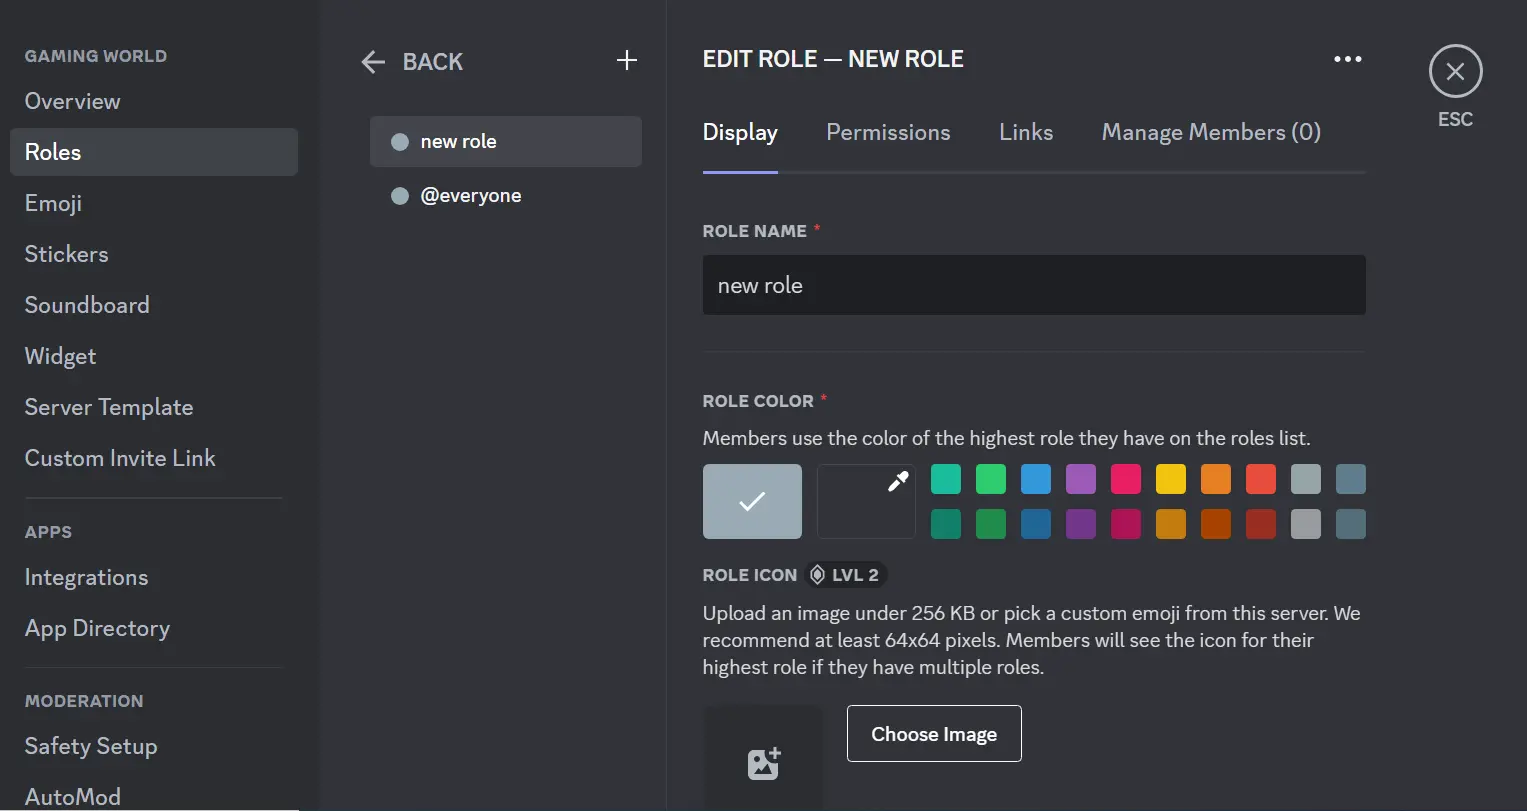
That’s it. Your new role has been created.
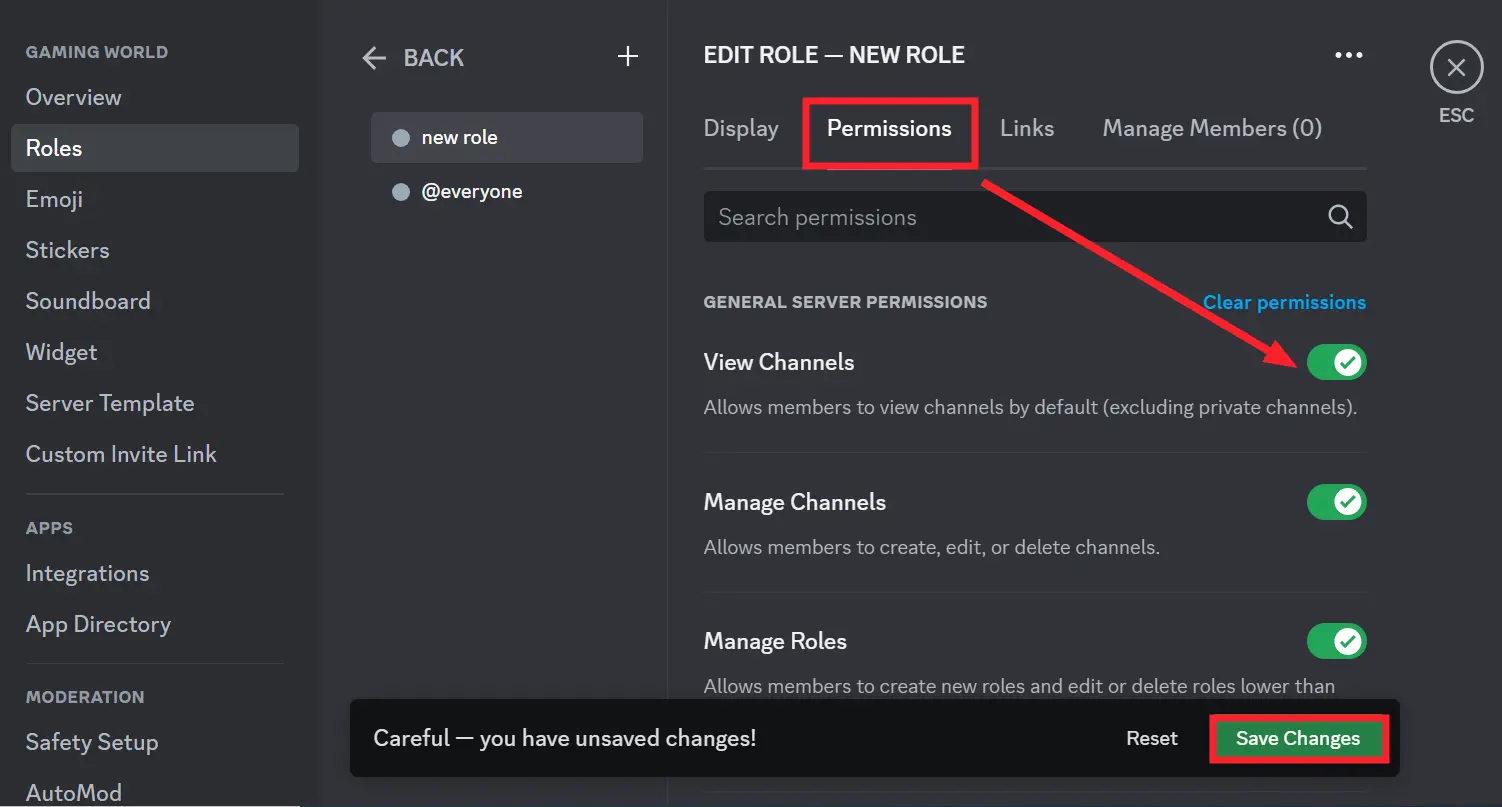
3. Turn On Permissions For The Newly Created Role
Now, it’s time to enable permissions for the role that we just created. Here’s how:
- Step 1: Choose the newly created Role
- Step 2: Go to the Permissions Tab
- Step 3: Use the toggle button to Enable the permissions
- Step 4: Don’t forget to hit the Save Changes button at the end
4. Assign The Role To Specific Members Within Your Server
The last step but certainly not the least is to assign the new role to your server members who you think should have access to the server’s channels.
- Step 1: Within Server Settings, scroll down the left pane and click on Members
- Step 2: Tap on the ‘+’ Icon appearing next to the member’s name
- Step 3: Then, select the Role that appears in the box below
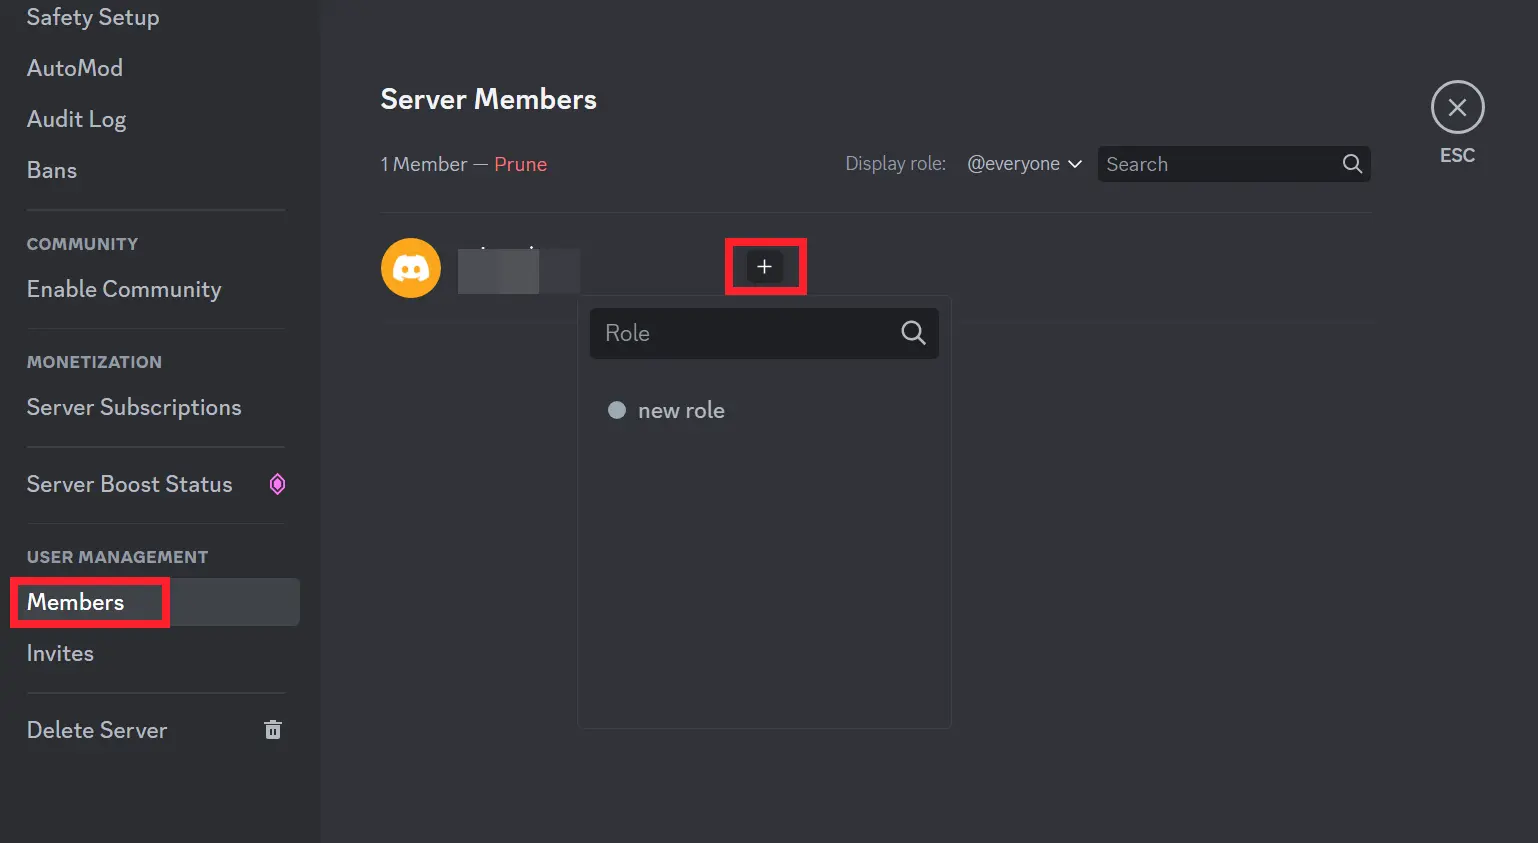
By doing so, you can successfully assign the role to your desired server member.
SEE ALSO:
- How To Self-Assign Roles In Discord?
- Why Cannot I Resize GIFs In Discord
- How To Bypass New Login Location Detected Discord (Without Email)
- What Does Discord Sticker Invalid Asset Mean & How To Fix It
Wrapping Up:
There you have it – your private role on Discord. In this article, we’ve explained: “How to make a private role in Discord.” The next time you invite new members to your server, you’ll need to provide them with a role before they can engage in the channels.

An experienced technical writer who specializes in simplifying technical jargon. Being a lifelong learner, she stays up-to-date with the latest trends and tools in the world of technology. When she’s not writing technical stuff, you can find her reading self-help books.


