
Businesses who want to make the most of their internet presence now can’t do without Meta Business Suite. Businesses may make it easier for customers to find and buy their products by using features like product tagging to connect products to postings.
But these features won’t do much good unless they work without a hitch. Businesses’ capacity to engage with their target demographic and the efficacy of their online strategy might be negatively affected when product tagging fails.
In this post, we will investigate the possible causes of the problems that customers are experiencing with the Meta Business Suite product tagging.

Why is Meta Business Suite product tagging not working
Short answer: The Meta Business Suite product tagging isn’t working because of bugs in the software, problems with the network or browsers, server problems, or breaking the rules.
Reason 1 – Technical Glitches
It’s possible that problems with technology inside the Meta Business Suite platform itself are one of the key causes of the difficulties associated with product tagging.
Every piece of software has the potential to develop bugs and glitches, which might interfere with the features’ ability to perform normally and can cause other issues like Meta Business Suite notifications not working.
Reason 2 – Network and Browser Issues
There are occasions when problems with product tagging might be ascribed to problems with the network or the browser. There is a possibility that the performance of Meta Business Suite might be hindered by slow internet connections, outdated browsers, or unnecessary browser extensions.
Reason 3 – Server issues
There is a possibility that Meta’s servers could encounter downtime or other problems, which will disrupt the normal operation of product tagging.
Reason 4 – Violating the rules
In order to ensure that users continue to have a great experience, Meta has established particular standards and guidelines surrounding product tagging.
If any of these rules are violated by your product tags, it is possible that they may not function as intended, or that your account will be subject to limitations.
How to enable product tagging on Instagram
Product tagging on Instagram is a feature that is beneficial to companies since it enables users to explore and purchase things directly through the site.
This makes it a lucrative tool for businesses. In order to facilitate the process of product tagging, it is necessary to fulfil specific eligibility conditions and proceed through a series of steps.
Step 1 – Check for eligibility
Instagram shopping eligibility is a prerequisite to tagging all the amazing things you sell.
Step 2 – Link to your Facebook profile
A Facebook Page is required to link your Instagram business account. Go into your Instagram settings and connect your user account to your profile on Facebook if you haven’t already.
Step 3 – Set up an account with business manager
Please note that in order to set up your shop in Facebook Commerce Manager, you will be required to create an account with Facebook Business Manager.
Step 4 – Create your store
Using Facebook Commerce Manager, you may set up your online store. When you want to establish a shop on Instagram or Facebook, you will need to choose the payment option and the channels for sales.
Step 5 – Include items in your store
After your store has been established in Commerce Manager, you have the option of adding items either by connecting to an existing catalog or by adding them one at a time.
Step 6 – Submit for evaluation
Submitting your items to Instagram for evaluation is the next step after setting up your online shop. Instagram will check your profile for policy compliance.
Step 7 – Wait for Approval
It can take a few days for Instagram to examine your account. If any further information is needed or your account is accepted, you will be notified.
Step 8 – Turn on the shopping function
You will be able to enable the shopping option after Instagram confirms your account. Just follow these few instructions.
- Click the three dots at the top of your Instagram profile for your company.
- Click on Settings.
- Select Shopping from the Business menu.
- To link a Product Catalogue, choose it.
- Choose “Done.” at the bottom.
Step 9 – Publish and Tagging Products
Photo uploads should be done in the same manner as a standard post. There is a maximum of five goods that may be tagged for each photo.
- Simply tap the “Add photo” button and provide a caption.
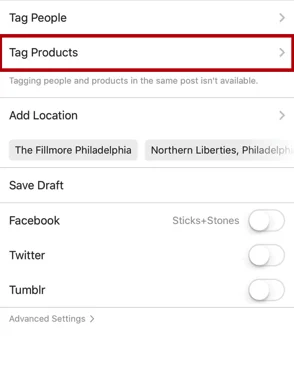
- Select “Tag Products.” following that Tap on the image.
- Browse the catalogue for the product you’re looking for, and then click on it.
- After that, hit the Done button and then hit the Share button.
How to tag products on Facebook after posting
If you’ve got a product catalogue linked to your Facebook Page, tagging items on Facebook after publishing is a simple process. To learn how to tag items in a Facebook post, follow these steps:
- Step 1- To begin tagging a post, go to its top right corner and look for the “Edit Post” option.
- Step 2- Once you’re in edit mode, find the “Tag Products” icon and click on it.
- Step 3- A list of products from your Facebook Catalogue will show up when you begin to type the title of the product you want to tag from that point on.
SEE ALSO:
- Fix: Meta Business Suite Schedule Post Not Working
- Fix: Meta Business Suite Notifications Not Working
- Meta Business Suite Not Posting To Instagram (Reasons & Solutions)
Final Words
Your social media material may become a potent sales tool for your business if you follow these procedures and apply these ideas to tag items on Facebook after posting.

Technical writer and avid fan of cutting-edge gadgetry, Abhishek has authored works on the subject of Android & iOS. He’s a talented writer who can make almost any topic interesting while helping his viewers with tech-related guides is his passion. In his spare time, he goes camping and hiking adventures.


