
Today’s article is going to be about Why do songs become unavailable on Apple Music. This article will cover the root cause of this problem with the solutions. So without any delay let us get into the article straightway.
Why do songs become unavailable on Apple Music?
There can be multiple reasons if the songs become unavailable. First, make sure that the device on which you are using the Apple Music is connected to an internet connection. Songs show unavailable when not connected to the internet. Another reason can be iCloud storage.
Since iCloud storage is limited, it cannot fit all songs in the cloud. So if you are listening to the songs offline and facing this issue, then the cloud can be the cause. Now sometimes, some songs are not available in your region or your Apple Music can’t track the location properly, then this problem occurs.
Since we have discussed the reasons for these problems. Therefore, we should directly jump to their solutions now.
How to fix the songs which become unavailable on Apple Music
Method 1: Check your location
This is a crucial step for rectifying the issue you are facing. Now follow the steps to check your location settings.
-
Step 1: Open the settings
Open the settings on your iPhone. You will find multiple options related to your phone.
-
Step 2: Tap on your Apple ID
Under the settings tab, the top most option is the Apple ID. Click on that. As soon as you click on that, you will see all the information about your account.
-
Step 3: Select Media and purchase
Now in the id section, select Media and purchase.
-
Step 4: Tap view account
Now tap on view account. You will see all the details related to your purchase and account.
-
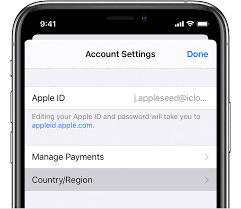
Step 5: Select Country/region
Click on the arrow and, a list of different countries will appear on your screen. Select the region/country you are in at the moment.
-
Step 6: Review the terms and conditions
Answer the on-screen prompts.
-
Step 7: Enter the payment information
Finally, enter the new payment mode according to your region. And save the changes.
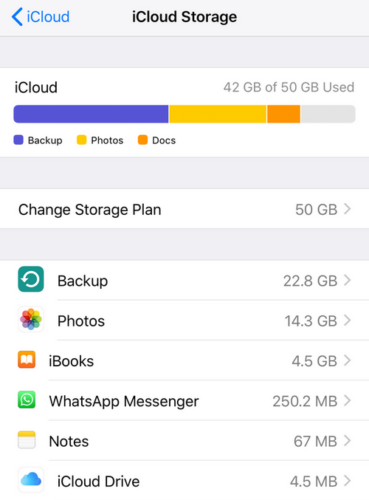
Method 2: Clear space
This problem can occur as there is limited space on iCloud. Clearing the space on iCloud can fix the issue.
-
Step 1: Open the app
Unlock your phone and check if it is connected to an internet connection. Now, look for the required app. Tap on the logo to open it.
-
Step 2: Go to settings
Open the settings of the app. You will find multiple options related to the app on your screen.
-
Step 3: Select General
Now click on General. It must be present at the top of the dialog box. As soon as you click on it, a new page will appear.
-
Step 4: Select Storage and iCloud Usage
Now, highlight Storage and iCloud Usage option. You will see multiple options which are responsible for the storage and other information about iCloud. Now finally select clear space.
Method 3: Sync Library
Sometimes, the songs show unavailable because they are not synced to your library especially when you are listening to songs offline.
In iPhone or iPad
-
Step 1: Go to settings
Unlock your phone. Now, open the settings by clicking on the settings app. The settings app is present on the homepage with other apps. The settings window will appear with a list of setting options for your phone.
-
Step 2: Select Music
Now scroll down the setting options and find the Music option. This option will get you one step closer to syncing your Music. After finding the option, tap on it. A new window will appear on your screen.
-
Step 3: Turn on Sync library
Now in the Music window, look for Sync library. It must be present under the Library option. You must see a toggle beside the option. If you can’t see the toggle option, subscribe to Apple Music first. Now turn on the Library sync.

The toggle switch must appear green as soon as you turn it on. The green color indicates that the setting is on. Now, wait for it to sync.
For Mac
-
Step 1: Open the Apple Music App or iTunes
The Apple Music or iTunes is present in the application folder. Click on it. A list of songs and settings will display on your screen.
-
Step 2: Choose Music
Now from the menu bar, select Music.
-
Step 3: Select Preferences
Under the Music tab, choose preferences. It will show the list of preferences that you can edit.
-
Step 4: Go to the general tab
Now go to General. A window names General Preferences will open on your screen.
-
Step 5: Turn on the Sync Library option
Now under the Library option, click on the Sync Library option. Its box will be highlighted as soon as you click on it.
-
Step 6: Click OK
Now click on OK to save your modified setting. It must be present at the bottom of the General Preferences dialog box.
Method 4: Restart your device
This method will fix the minor issues in case your app is facing any.
iPhone or iPad
If your Apple Music is not working on your iPhone or iPad then, you need to restart it. In order to do that, follow the steps given below.
-
Step 1: Press the volume or power button
Make sure your phone is on. Now you need to press either the power or volume button present on your phone.
-
Step 2: Drag the slider
Drag the slider now and select the restart option.
-
Step 3: Choose to turn it off
After choosing restart, tap on it. Your phone will restart automatically.
-
Step 4: Switch on your phone
Now, wait for a few seconds and then press the power button slightly. Your phone now must turn on and check if you are still facing the issue or not.
For Mac
-
Step 1: Click the apple icon
Click on the apple icon present on your taskbar. You will see the start menu appear on the screen.
-
Step 2: Select restart
Look for the restart option in the start menu. When you find it, highlight and click on it.
-
Step 3: Restart will begin
As soon as you click on it, the window or your screen will start dissolving and, the restart procedure will start automatically in a few seconds. You don’t need to turn on your computer as it will start again on its own.
SEE ALSO:
- If I rejoin Apple Music will I get my music back? (Yes, Here is How)
- [Fixed] Why does Apple Music say content not authorized
- [Fixed] Why does my Apple Music stop when I open Facebook?
- Why are some songs not available in my country Apple Music
Hope this article helped you fix your problem. For further issues, contact the Apple customer care.


