
Microsoft Exchange, a widely adopted email server solution, is the essential component that supports communication for a great number of businesses and organizations. It gives customers the ability to easily manage their emails, calendars, contacts, and tasks through a variety of clients, one of the most prominent of which is Microsoft Outlook.
However, users’ productivity may be significantly affected, and they may become even more upset if they encounter a situation in which a Microsoft Exchange administrator has restricted Outlook, resulting in the ‘Cannot open Outlook window, The set of folders cannot be opened.’ issue.
In this article, we will investigate the motivations behind such activities, the potential repercussions for users and organizations, and the efforts that may be taken to mitigate and prevent this problem.
Why has your Microsoft Exchange administrator blocked Outlook?
Short answer; Your Microsoft Exchange administrator stopped Outlook because of security flaws, compatibility problems, compliance requirements, protection against malware and phishing, or feature limits.
Reason 1 – Security Vulnerabilities
Outdated or unsupported versions of Outlook could have known security flaws that could leave the organization’s data vulnerable to attack. These flaws could be exploited by malicious actors. Administrators of Exchange can disable these versions to guarantee that users are not running software that could compromise the security of the company.
Reason 2 – Compatibility Issues
There is a possibility that new versions of Microsoft Outlook will make changes that are not fully compatible with the Exchange structures that is already in place at the organization. When this happens, system administrators could decide to temporarily disable the new version until the compatibility problems are fixed.
Reason 3 – Compliance Requirements
The use of software that is either obsolete or not supported might lead to compliance violations in certain businesses, which have very stringent regulations. It is possible for administrators to disable versions of Outlook that do not comply with the norms governing the industry or the laws protecting personal data.
Reason 4 – Malware and Phishing Protection
It’s common for Outlook updates to provide stronger protections against malware and phishing efforts. To prevent attacks that rely on these vulnerabilities, administrators may disable support for older versions.
Reason 5 – Feature Limitations
The latest versions of Outlook typically come packaged with a plethora of new features and improvements to existing ones. In order to encourage users to upgrade and take advantage of these capabilities, administrators may choose to disable earlier versions of the software.
Fix: Microsoft exchange administrator has blocked outlook
Method 1 – Use the latest version of Office
It can be very aggravating to have problems with Microsoft Exchange that lead to the blocking of access to Outlook. Making sure that your company is always running the most recent version of Microsoft Office is an efficient method for resolving issues of this nature and is one of the most widely used strategies.
Microsoft has updated the prerequisites for connecting Outlook applications to Office 365 and Microsoft 365 services, including changing the minimum version requirement. Microsoft will no longer provide support for versions of Office 2016 that are older than 16.0.4600.1000.
You have the option of upgrading from the previous versions of Office that you are currently utilising to either Office 365 or a higher version of Office, such as Office 2019 or Office 2021. You will need to download Microsoft 365 in order to accomplish this, and if you want further information about how to do so, the procedures are as follows:
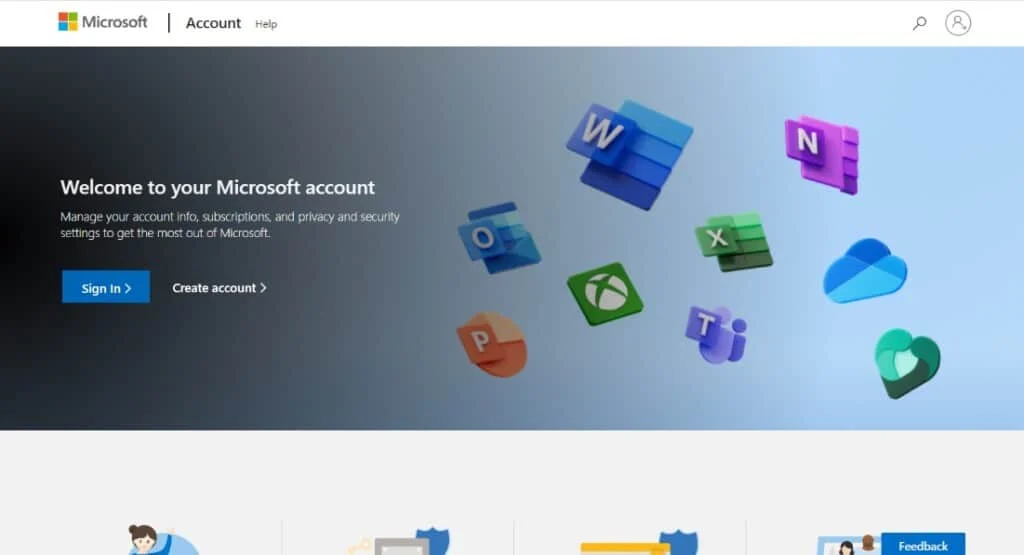
- Step 1- If you are not currently logged in, you will need to navigate to the dashboard of your Microsoft account and sign in there.
- Step 2- Proceed to the “Dashboard” section of your Microsoft account.
- Step 3- Next, select Services and subscriptions from the menu that appears at the top of the page.
- Step 4– In Microsoft Account, choose the services and subscriptions
- Step 5– To get Office 2019 or any other software from Microsoft 365, go to the next page and click the Install button next to the product’s name.
- Step 6- To install the product on your personal computer, open Chrome and navigate to the Setup menu.
- Step 7- After the product has been installed completely and activated, you will be able to launch the software and resume using your Outlook account.
Method 2 – Establish a database of public folders in Exchange 2010
The Microsoft Exchange administrator has banned problem can also be fixed by making a public folder database in Exchange 2010.
Organisational communication and collaboration have been greatly improved with Microsoft Exchange 2010. The Public Folder database is a vital part of it since it facilitates the exchange of information including schedules, contact lists, and files.
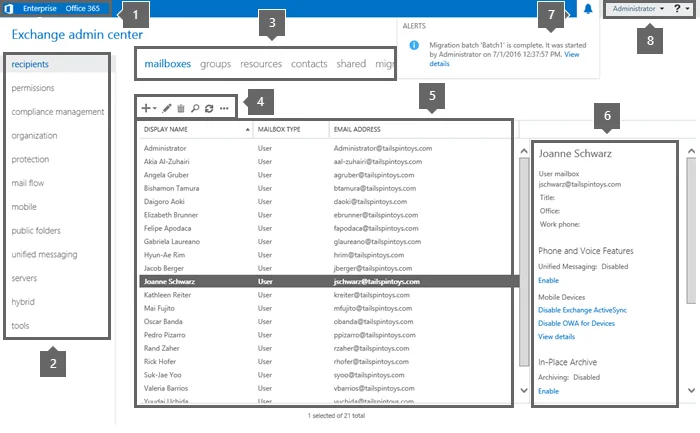
- Step 1- To access your mailbox, launch the Exchange Management Console and navigate to the Organisation Configuration folder.
- Step 2– Then, in the actions pane of the Database Management subtab, select New Public Folder Database.
- Step 3- Third, give the database a title in the Public folder database name field.
- Step 4– Select the Exchange server that will store the public folder database by clicking Browse next to Server name.
- Step 5- Please click next.
- Step 6- After confirming that the Log folder and Database file paths are correct defaults, click Next.
- Step 7- choose New to initiate making a new public folder file.
- Step 8– Select Finish to complete the setup process.
Method 3 – Remove the current profile and create a new one
There is a risk that the current Outlook profile will be compromised if connectivity or syncing issues, or corrupted data files, persist. A new beginning is possible when the profile is recreated.
- Step 1- To manage your Outlook profiles, go to File > Account Settings > Manage Profiles.
- Step 2- Choose to Display Profiles.
- Step 3- Simply choose a profile and click the Delete button.
- Step 4- To make a fresh account,
- Step 5- In the Settings menu, select Mail (Microsoft Outlook).
- Step 6- Make a fresh account.
- Step 7- To add a new user, simply click the “Add” button and fill out the form with the user’s information.
- Step 8- Then, select the profile-using prompt. When you launch Outlook, a little window will pop up asking you to select a profile to use.
Method 4 – Reinstall the Office
When other troubleshooting steps, such as restoring individual applications or user profiles, fail to fix Microsoft Office, a complete reinstallation of the suite is required. This method guarantees a clean installation of the Office suite and addresses underlying issues, reducing the likelihood of future failures.
- Step 1– Sign into Microsoft 365 with your Microsoft account by visiting the portal page.
- Step 2- Click the Office Setup option.
- Step 3– Visit the Microsoft 365 Home webpage and click on the Install Office button.
- Step 4- Select Install from the Download and set up Microsoft 365 Home screen.
- Step 5– A window asking whether you want to Run or Save the downloaded file may display, depending on the browser you’re using. Choose the “Run” option.
- Step 6– Office prepares and installs the Office applications.
- Step 7– After Office has finished installing, it may ask for your email address or phone number so that it can send you a link to download the Office mobile apps.
Method 5 – Disable Cache Exchange Mode
- Step 1- Launch the Account Settings menu in order to disable the cached mode.
- Step 2- You need to disable the Cached Exchange Mode by doing a double click on the account.
- Step 3– This will function directly with the online version of Outlook. Then Restart Microsoft Outlook.
Method 6 – Transfer the mailbox to a different Exchange Server database
The mailbox can be moved to a different mailbox database on the same Exchange Server. The Exchange Admin Centre (EAC) is where this is managed. Migrating mailboxes from one Exchange Server database to another entails moving user email accounts and all of their associated emails, contacts, and calendar events.
- Step 1- Once you’ve logged into the portal, navigate to the Recipients section and then the Migration tab.
- Step 2- Select Transfer to another database by clicking the addition (+) button.
- Step 3- Choose the mailbox you want to move and the database you want to send it to. Then select the Finish button. You can check the mailbox’s status once the migration job has been initiated.
- Step 4- The following PowerShell command can be used with the Exchange Management Shell (EMS) to do this.
- New-MoveRequest -Identity [email protected] -TargetDatabase db2
Method 7 – Check Outlook Anywhere Settings
You may check the Outlook Anywhere configurations in Exchange Server. Previously known as RPC over HTTP, the Anywhere feature enables remote access to Microsoft Exchange Server and Microsoft Outlook from anywhere outside the corporate network without the need for a VPN.
To accomplish this, launch the Exchange Management Shell (EMS) and type the following PowerShell command. Get-OutlookAnywhere | F
You can use this to confirm data on your Exchange Server. As shown below, the Set-OutlookAnywhere command can be used to alter the IIS Authentication procedures.
Set-OutlookAnywhere -Identity “EX2019\Rpc (Default Web Site)” -SSLOffloading $true -ExternalClientAuthenticationMethod NTLM -InternalClientAuthenticationMethod NTLM -IISAuthenticationMethods Basic,NTLM,Negotiate
Method 8 – Verify Active Directory Attribute Schema
Active Directory stores all configuration and recipient data for Exchange Server 2016 and 2019. When an Exchange server needs recipient and organization configuration information, it searches Active Directory. Active Directory servers are needed for Exchange.
Active Directory Schema can be updated in the following ways:
- Step 1- ADSIEDIT.MSC must be launched.
- Step 2- To connect, right-click, and select the option.
- Step 3- Select Configuration as the Naming Context and then click OK.
- Step 4- Navigate to the Configuration, Services, Microsoft Exchange, First Organization, Administrative Group, Exchange Administrative Group, and Databases sections of the interface.
- Step 5- Get the database where the impacted users are working on it open.
- Step 6- Locate the msExchHomePublicMDB attribute in the Attribute Editor tab, and delete any existing “not set” values.
- Step 7- Select the “OK” button.
SEE ALSO:
- Fix: Microsoft Outlook Is Requesting Data From The Server
- 7 Fixes : Microsoft Outlook Not Implemented
- Fix: ‘Cannot Open Outlook Window. The Set Of Folders Cannot Be Opened.’ Error
- Fix: Outlook ‘Something Went Wrong & Your Search Couldn’t Be Completed’
Final words
The choice made by Microsoft Exchange administrators to prevent users from accessing Outlook may appear to be disruptive. Nonetheless, this action is typically implemented for legitimate reasons related to security, compliance, and maintenance.

Technical writer and avid fan of cutting-edge gadgetry, Abhishek has authored works on the subject of Android & iOS. He’s a talented writer who can make almost any topic interesting while helping his viewers with tech-related guides is his passion. In his spare time, he goes camping and hiking adventures.


