You don’t need a huge renovation budget to make your home look more beautiful. Sometimes, a fresh coat of paint, updated cabinet hardware, or a few well-placed shelves can completely change the way a room feels. The best part? Many of these simple upgrades can be completed in a single weekend without hiring a contractor or spending hundreds of dollars.
These 10 easy weekend DIY home projects under $100 include budget-friendly kitchen makeovers, secondhand furniture transformations, creative wall updates, simple storage solutions, and small improvements that make your home feel more polished. Whether you’re decorating your first apartment, refreshing an older house, or looking for inexpensive ways to upgrade a room, these ideas offer practical starting points.
Each project includes an estimated supply budget, step-by-step instructions, styling tips, and affordable shopping suggestions. The estimates are intended for small-scale projects using common household tools you already own or can borrow. Actual costs vary by location, materials, and project size.
Affiliate disclosure: As an Amazon Associate, I earn from qualifying purchases. This article contains affiliate links, which may earn us a commission at no extra cost to you.
More Budget-Friendly DIY Home Decorating Ideas
If you love affordable home improvement projects, these related guides from Android Nature offer more inspiration for updating your home without a major renovation.
How to Plan a DIY Home Makeover for Less Than $100
The secret to staying under budget is choosing one specific area to improve instead of trying to update an entire room at once. For example, painting a small vanity or updating a few cabinet handles can create a visible difference without requiring you to replace the surrounding fixtures or furniture.
Before shopping, measure your project area and write down the supplies you actually need. Check your garage, storage closet, or toolbox for brushes, tape, screws, and other materials you may already own. Borrow tools that you won’t use frequently and compare prices at local hardware stores, thrift stores, and online retailers.
Easy under-$100 DIY formula: One manageable project + reusable tools + affordable materials + a small contingency budget + enough time for proper preparation and drying.
For a $100 spending limit, aim to keep your planned purchases around $80 to $90. That leaves a little room for extra supplies. If a project requires electrical work, major plumbing changes, hazardous material removal, or structural modifications, don’t force it into a DIY budget. Choose a safer cosmetic alternative or budget separately for qualified help.
Weekend DIY Project Budget Comparison
DIY Project
Estimated Supply Cost
Difficulty
Small Countertop Refresh
$45–$95
Moderate
Dining Table Makeover
$30–$85
Moderate
Lighting Refresh
$20–$80
Easy
Small Cabinet Painting Project
$45–$95
Moderate
Decorative Doorway Trim
$35–$90
Moderate
Front Door Painting
$45–$95
Easy to Moderate
Thrifted Gallery Wall
$25–$85
Easy
Small Peel-and-Stick Backsplash
$40–$95
Easy to Moderate
Floating Shelf Installation
$35–$90
Moderate
Cabinet Hardware Replacement
$20–$75
Easy
Budget note: These are approximate U.S. material costs for modest project sizes, assuming you already own or can borrow basic tools. Taxes, delivery, professional labor, extensive repairs, and specialized equipment aren’t included. Coatings may need additional curing time beyond the weekend.
10 Easy Weekend DIY Home Projects Under $100
1. Refresh a Small Countertop With a Suitable Coating
If your countertop looks outdated but is still in good condition, a cosmetic refresh can make a surprising difference. A new finish may help a small bathroom vanity, laundry counter, or other suitable surface look cleaner and more modern without replacing the entire countertop. This is a useful project when you want a visible update but have limited money for renovations.
Start by identifying the countertop material. Laminate, wood, solid surface, granite, and other materials require different preparation and compatible products. Choose a coating or refinishing system specifically approved for the material and intended application. Clean and prepare the surface according to the manufacturer’s instructions, protect surrounding fixtures, and apply the finish only where approved. Allow the required ventilation, drying, and full curing time before returning the counter to use. Never assume ordinary appliance paint is suitable for a food-preparation surface, and don’t use an unapproved coating where food will directly contact it.
Budget estimate: $45–$95 for a small compatible surface, including basic preparation and coating materials. A full kitchen countertop refinishing project may exceed $100.
Styling tip: A soft cream, warm gray, or understated stone-look finish can complement existing cabinetry. Always test a small sample and confirm the coating will perform as required.
Look for surface-specific refinishing systems and preparation supplies. Verify material compatibility, food-contact restrictions, ventilation, and curing instructions before purchasing.
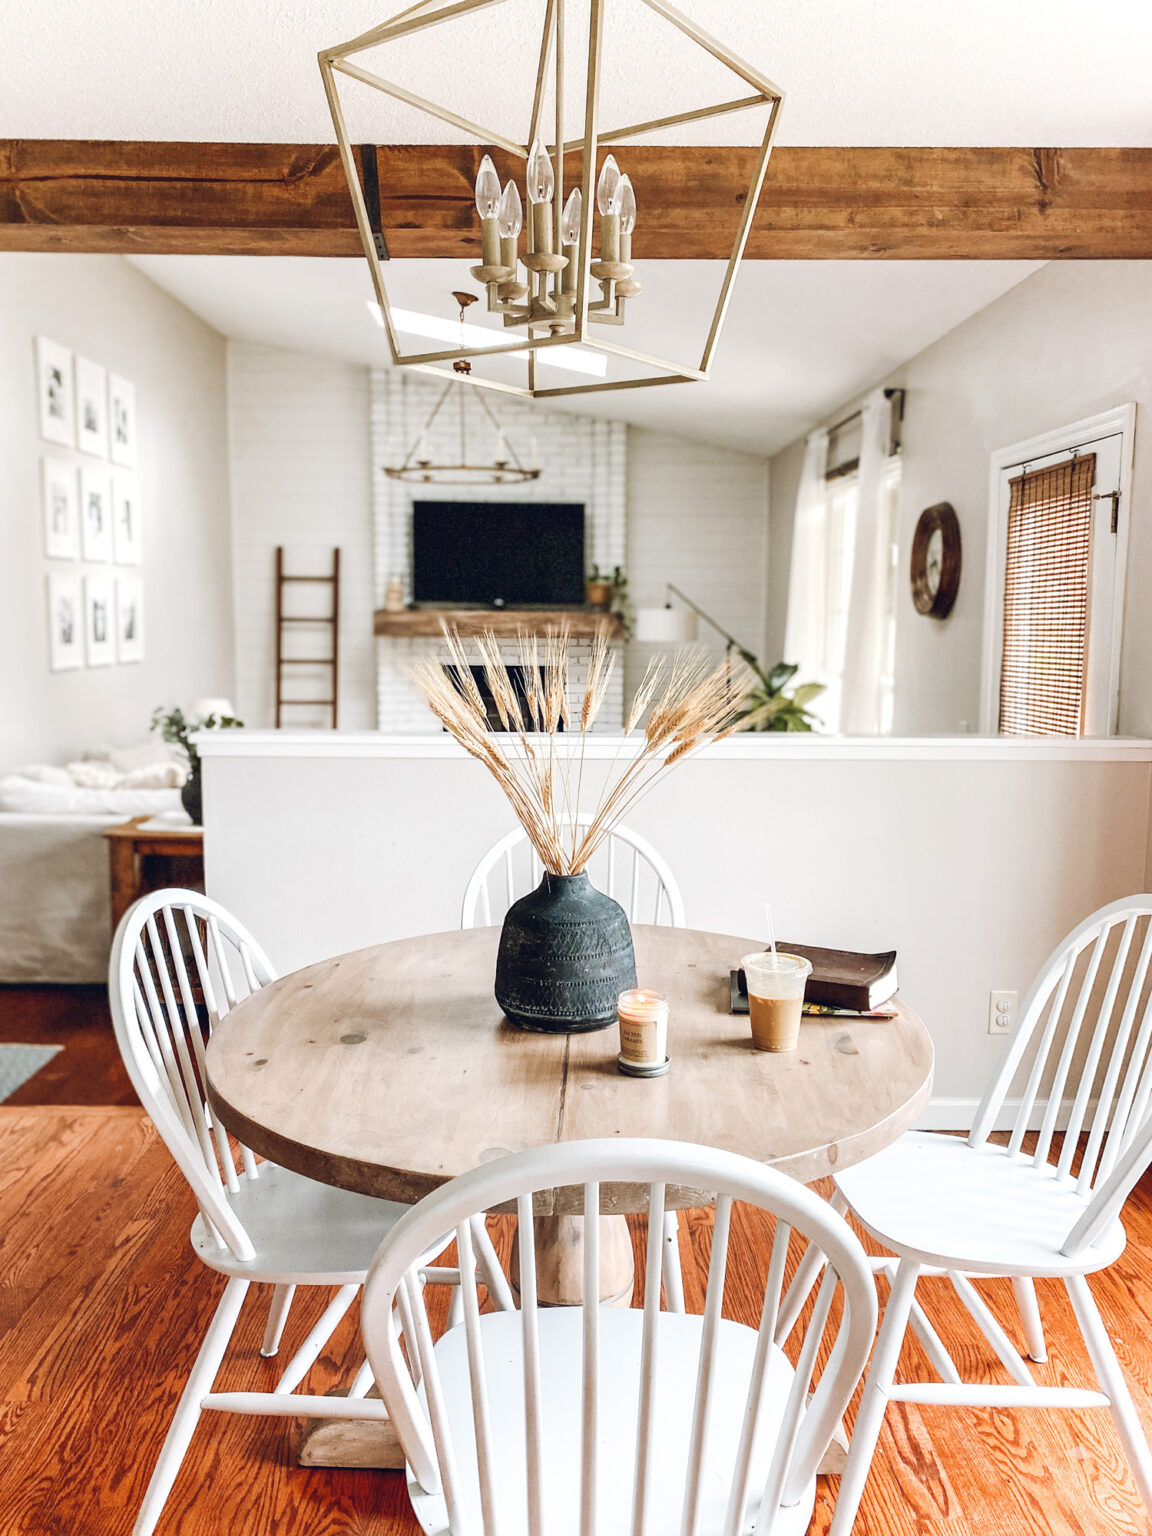
An outdated dining table doesn’t always need to be replaced. If the frame is sturdy and the surface is suitable for refinishing, a fresh coat of paint, stain, or protective finish can give the entire dining area a different appearance. This project is especially appealing if you already own a solid wood table or find an inexpensive secondhand piece that needs a little attention.
Begin by checking the table’s construction and existing finish. Tighten loose hardware and repair minor problems before decorating. If the tabletop is suitable for refinishing, clean and prepare it using the method recommended for its material. Solid wood, veneer, laminate, and painted surfaces require different approaches. For a farmhouse look, consider a natural wood top with painted legs. For a contemporary style, use a consistent muted paint finish with a compatible protective coating. Let the finish cure fully before placing dishes or furniture accessories on the table.
Budget estimate: $30–$85 for paint or stain, suitable preparation materials, brushes, and finish. This assumes you already own the table and basic tools.
DIY tip: For an older piece with an unknown coating, assess the possibility of lead paint before sanding. A simple cleaning and hardware refresh may be safer than disturbing the finish.
Lighting can have a huge influence on how a room looks and feels. A dark corner may become a cozy reading nook with the right lamp, while a plain kitchen counter can feel more polished with well-placed task lighting. You don’t always need to replace a ceiling fixture to get a noticeable improvement.
For a beginner-friendly weekend project, focus on plug-in lighting, compatible replacement lampshades, or simple repositioning. Add a small table lamp to an entryway console, place an approved plug-in task light beneath a suitable cabinet, or use a floor lamp beside a reading chair. Choose bulbs that match the fixture’s specifications and select a consistent color temperature for nearby lights. Keep cords tidy and away from walkways or water. If you want to change a hardwired chandelier, ceiling light, or wall sconce, budget for a qualified electrician rather than treating electrical wiring as a casual DIY task.
Budget estimate: $20–$80 for a plug-in lamp, shade, or approved task-light kit. Hardwired fixture replacement and professional electrical labor are not included.
Styling tip: Warm-white lighting can make a living room or bedroom feel inviting, while brighter task lighting may be preferable for a desk or food preparation area.
Painting kitchen cabinets can create a dramatic transformation, but refreshing an entire kitchen may require more than $100 in materials. A more realistic weekend project is to paint a small cabinet section, such as a compact kitchen island, one pair of lower cabinet doors, or a separate pantry cabinet. This gives you an opportunity to test a new color without committing to a full kitchen makeover.
Choose structurally sound cabinets and remove the doors and hardware where practical. Clean away grease, dirt, and residue, then prepare the surface according to the cabinet material and paint manufacturer’s instructions. Apply a suitable bonding primer and thin coats of durable cabinet paint. Leave enough drying time between coats and allow the finish to cure as directed before reinstalling hardware or using the cabinets heavily. Sage green, warm white, navy, and muted charcoal can look beautiful when coordinated with existing countertops and floors.
Budget estimate: $45–$95 for a small cabinet section, assuming limited surface repairs and existing tools. A complete cabinet painting project may cost considerably more.
Practical tip: Do not paint over swollen panels, active moisture damage, or peeling surfaces without resolving the cause. Check older coatings for potential lead hazards before disturbing them.
5. Add Decorative Trim to a Plain Doorway
Decorative doorway trim can make a basic room look more finished without replacing the doors or changing the layout. A simple casing around an interior opening adds architectural detail and can connect the doorway to your existing baseboards and wall molding. This project works particularly well in farmhouse, traditional, and transitional homes.
Start by measuring the doorway and examining the existing wall edges and trim. Choose appropriately sized molding that complements the room. Pre-primed trim can reduce finishing work, while simple flat boards create a clean modern look. Have the materials cut to the required dimensions using suitable tools or a store’s cutting service when available. Install the trim with the fastening method appropriate to the wall and material, then fill permitted fastener holes, finish the joints, and paint the trim to match the existing woodwork. Don’t obstruct the door swing, hinges, latches, or required clearances.
Budget estimate: $35–$90 for a modest interior doorway with basic molding and finishing supplies, assuming the opening does not need structural or drywall repairs.
Styling tip: Repeat the color and general profile of your baseboards to create a more cohesive appearance. Simple trim often looks more timeless than an overly ornate design.
Amazon Find: Wood Trim Finishing and Measuring Tools
Basic measuring tools, sanding supplies, and compatible finishing accessories can help with a small trim project. Select molding and fasteners according to your actual doorway and wall conditions.
Your front door is one of the first details visitors notice, making it an excellent place to start a budget-friendly exterior refresh. A new coat of paint can help an older door look cleaner, more welcoming, and more coordinated with the home’s exterior. This project can create a noticeable change without replacing the door itself.
Choose an exterior paint suitable for the door material and exposure conditions. Popular colors include navy blue, sage green, charcoal, deep red, and warm black. Remove or protect the hardware, clean the door, and prepare its surface according to the coating instructions. Apply compatible primer if required, followed by thin coats of paint. Plan for the correct temperature, weather, ventilation, and drying time. Make sure the door can close and lock safely during the project, and never compromise household security to complete a paint job quickly.
Budget estimate: $45–$95 for paint, preparation materials, painter’s tape, and basic supplies on a suitable door in good condition.
Styling tip: Choose a door color that complements your siding and trim. A single new doormat or small planter can complete the entrance without adding a large amount to your budget.
Small foam rollers, paintbrushes, painter’s tape, and sanding supplies can help create a neater finish. Choose primer and paint based on the door material and exposure.
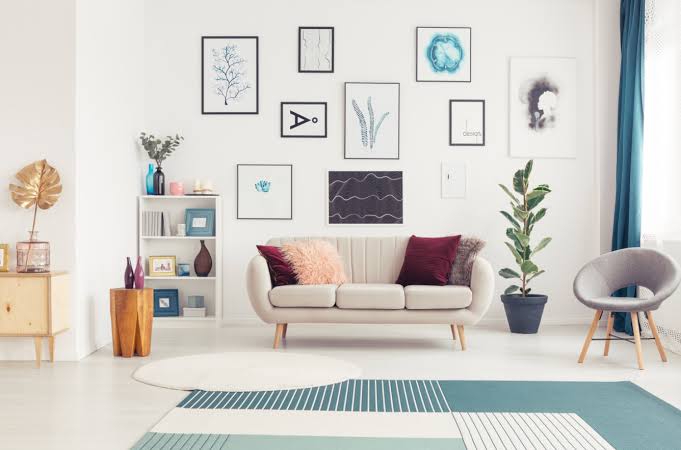
A gallery wall can completely change the appearance of a living room, hallway, or bedroom without requiring expensive original artwork. Thrift stores, secondhand shops, and garage sales are excellent places to find interesting frames and decorative prints. Mixing different frame sizes can make the arrangement feel personal and collected over time.
Choose five to seven inexpensive frames and decide on one common element, such as matching black finishes, natural wood, or a shared art palette. Fill them with personal photographs, botanical prints, travel pictures, or artwork you already own. Arrange the frames on the floor before hanging anything, starting with the largest piece and working outward. Keep the spacing reasonably consistent and use suitable picture-hanging hardware for each frame’s weight and your wall material. Avoid installing frames where people may knock against them in narrow hallways.
Budget estimate: $25–$85 for secondhand frames, inexpensive prints, minor finishing supplies, and appropriate hanging hardware.
Budget tip: Use artwork and photographs you already have. Spending most of the budget on a few attractive frames can create a more meaningful display than buying an entirely new set of generic prints.
A peel-and-stick backsplash is a popular choice for a quick kitchen update because it adds pattern and texture without the complexity of traditional tile installation. A small backsplash behind a sink or on a short countertop wall can make basic cabinets look more coordinated and modern. It’s especially attractive when the existing wall is clean, smooth, and suitable for the selected adhesive product.
Measure the area and choose a backsplash designed for the actual wall surface and kitchen conditions. Subway-style patterns, small geometric designs, and soft stone-look finishes are versatile options. Clean the wall thoroughly and let it dry before following the product’s layout and application instructions. Begin with a straight reference line and work carefully to align the pattern. Use suitable tools to cut around edges and outlets, following electrical safety requirements. Do not cover outlets, switches, ventilation openings, or required access points. Keep adhesive products outside the manufacturer’s specified heat clearances around cooktops and other appliances.
Budget estimate: $40–$95 for a small backsplash area. A full kitchen backsplash may require additional materials and a larger budget.
Renter tip: A product advertised as removable may still damage paint or leave adhesive residue. Test a small section and check your lease before making changes.
Self-adhesive backsplash tiles come in subway, geometric, and stone-look patterns. Check coverage, wall compatibility, heat restrictions, and removal instructions before ordering.
Floating shelves are a beautiful way to make use of empty wall space, especially in small living rooms, bedrooms, and home offices. They provide practical storage without taking up floor space, making the room feel more organized. A pair of simple wooden shelves can also create a decorative feature above a desk or console table.
Choose a shelf kit with hardware suitable for your wall type and expected load. Measure the available space and mark the shelf positions using a level. Locate appropriate structural support and follow the manufacturer’s mounting instructions. Once the shelves are securely installed, arrange a small collection of books, lightweight pottery, framed photographs, or suitable plants. Keep the heavier items within the rated load capacity and avoid overcrowding the shelves. In a small room, one or two well-styled shelves usually look more polished than an entire wall of mismatched storage.
Budget estimate: $35–$90 for a small shelf set and suitable mounting supplies, assuming basic tools are available.
Styling tip: Pair natural wood shelves with cream ceramics, framed art, and one small plant. Leave open space between objects so the arrangement looks intentional rather than crowded.
Replacing cabinet hardware is one of the easiest weekend home projects for beginners. Small details such as drawer pulls and cabinet knobs can make older kitchen or bathroom cabinets look more polished without painting or replacing the doors. This update works especially well when the cabinetry is in good condition but the hardware feels dated or mismatched.
Start by counting the knobs and pulls you need. For handles with two mounting screws, measure the center-to-center distance between the existing holes before ordering replacements. Choose a finish that coordinates with the room, such as brushed brass, matte black, or brushed nickel. Remove the old hardware, clean the cabinet surfaces, and install the new pieces using appropriate screws. Avoid overtightening, which could damage the cabinet fronts. If you rent your home, obtain permission where required and keep the original hardware for reinstallation.
Budget estimate: $20–$75 for a modest set of replacement knobs or pulls and simple installation supplies.
Styling tip: Choose one main hardware finish for a coordinated look. Matching the existing screw spacing can save time and prevent the need to fill and drill new holes.
The best project depends on which part of your home needs the most attention. If you’re unsure where to begin, choose an improvement that solves an everyday problem while making the space more attractive.
For an outdated kitchen: Replace cabinet hardware or refresh a small cabinet section.
For a plain living room: Create a gallery wall or add a pair of floating shelves.
For a boring entrance: Repaint the front door or add simple doorway trim.
For a dark bedroom: Improve the lighting with a suitable plug-in lamp.
For old furniture: Refinish a table you already own.
For a plain kitchen wall: Consider a small peel-and-stick backsplash in an approved location.
Best Color Combinations for Budget DIY Home Projects
You don’t need to follow every decorating trend to make a budget home project look beautiful. Choosing a consistent palette can help inexpensive upgrades feel more connected to the furniture and finishes you already own.
Warm White, Natural Oak, and Black: Ideal for modern floating shelves, gallery walls, and simple cabinet hardware.
Sage Green, Cream, and Brass: A soft farmhouse combination for painted cabinets and furniture.
Charcoal, Ivory, and Walnut: A contemporary palette for doors, lighting, and accent furniture.
Dusty Blue, Warm Beige, and White: A calming combination for bedroom and small bathroom refreshes.
Terracotta, Cream, and Natural Wood: A warm earthy style for thrifted furniture and decorative wall art.
Navy Blue, White, and Brushed Nickel: A timeless choice for front doors, kitchen hardware, and modern accessories.
Weekend DIY Home Project Shopping Checklist
Before starting your project, gather the materials you’ll need and check which tools you already have. You don’t need every item on this list; choose only the supplies required for your specific improvement.
Item
Best For
Priority
Measuring Tape and Pencil
Planning and Layout
Useful for Most Projects
Painter’s Tape
Protecting Edges
As Needed
Drop Cloth
Protecting Furniture and Floors
Painting Projects
Paintbrushes and Small Rollers
Doors, Cabinets, and Furniture
Project-Specific
Compatible Primer and Paint
Surface Refreshes
Project-Specific
Sanding and Cleaning Supplies
Surface Preparation
As Required
Secondhand Frames
Gallery Wall
Optional
Peel-and-Stick Backsplash
Kitchen Wall Upgrade
Project-Specific
Floating Shelf Kit
Wall Storage
Optional
Appropriate Wall Fasteners
Secure Shelf and Frame Installation
As Required
Cabinet Knobs and Pulls
Cabinet Hardware Refresh
Optional
Protective Equipment
Applicable Cutting and Finishing Tasks
As Required
How to Make a DIY Home Upgrade Look More Expensive
The difference between a rushed DIY project and a polished one often comes down to preparation and finishing details rather than the amount of money spent.
Measure carefully: Accurate dimensions help trim, shelves, hardware, and decorative layouts look intentional.
Choose a simple palette: Use colors that complement your existing walls, furniture, and flooring.
Prepare surfaces properly: Clean and repair suitable materials before painting or applying adhesive products.
Use fewer decorative details: One attractive gallery wall or shelf arrangement often looks better than several crowded displays.
Match visible hardware: Coordinating cabinet pulls, handles, and other accessories creates a more consistent look.
Allow finishing time: Follow paint, adhesive, and coating curing instructions before using the updated area.
Reuse quality materials: Refreshing solid existing furniture can provide more value than buying inexpensive replacements.
Prioritize safe installation: Secure shelves, lighting, and other fixtures using methods approved for the actual materials and conditions.
Common Weekend DIY Home Project Mistakes to Avoid
Starting Without a Clear Budget
A project that appears inexpensive can become costly when you need extra paint, tools, adhesives, or repair materials. Make a supply list before shopping and include a small allowance for unexpected expenses. If the project no longer fits the budget, reduce its scope instead of skipping necessary preparation or safety steps.
Skipping Surface Preparation
Paint and adhesive products may fail when applied to dirty, greasy, damaged, or incompatible surfaces. Follow the manufacturer’s cleaning, preparation, and priming instructions. Repair moisture damage and other underlying problems before covering them with decorative finishes.
Using the Wrong Materials
Countertop coatings, cabinet primers, outdoor paints, backsplash adhesives, and shelf fasteners are not interchangeable. Confirm each product is approved for the surface and conditions where you’ll use it. Don’t assume something is suitable simply because it looks similar to another product.
Ignoring Electrical or Structural Safety
Hardwired lighting and load-bearing installations can require professional work. Avoid changing electrical wiring, attaching heavy shelves to unsuitable walls, or modifying structural doorway framing without proper assessment. Choose a simpler cosmetic project when the full work falls outside your skills or budget.
Rushing Paint or Adhesive Curing Time
A project may be applied in one weekend but still need additional time before normal use. Paint, countertop coatings, and adhesives have product-specific drying and curing requirements. Using surfaces too early may damage the finish or prevent proper adhesion.
Taking on Too Many Projects at Once
Trying to paint cabinets, install shelves, and update furniture during the same weekend can leave every project unfinished. Choose one manageable improvement, prepare the supplies in advance, and complete the necessary steps before beginning another project.
Frequently Asked Questions
1. What Is the Easiest DIY Home Project Under $100?
Replacing cabinet knobs and drawer pulls is one of the easiest projects for beginners. It usually requires only basic tools and careful measurements. A simple gallery wall or plug-in lighting refresh can also create a noticeable improvement without major construction.
2. What Home Improvements Can I Finish in One Weekend?
Small projects such as replacing hardware, creating a gallery wall, hanging suitable shelves, or installing a compact backsplash may be manageable over a weekend. Painting projects may also be started and substantially completed during that time, but the finish may require additional curing before normal use.
3. How Can I Make My Home Look Expensive on a Small Budget?
Focus on a few visible details rather than trying to renovate every room. Coordinated cabinet hardware, neatly painted trim, well-arranged artwork, and improved lighting can help a home feel more polished. Good preparation and careful finishing often matter more than expensive materials.
4. Are These DIY Home Projects Suitable for Renters?
Some are, depending on your lease. Freestanding lamps, personal artwork, and reversible hardware changes may be practical choices. Painting, drilling, and adhesive backsplash installation can alter surfaces, so obtain permission where required. Keep original fixtures for reinstallation when appropriate.
5. Which Budget DIY Project Should I Try First?
Start with the area that bothers you most and choose a small project that addresses it directly. For an outdated kitchen, try cabinet hardware. For a plain living room, create a gallery wall. For a dark corner, improve the lighting. Beginning with a manageable project helps you develop skills before attempting more involved improvements.
Recommended Finds on Amazon
A few affordable supplies can help you complete multiple DIY projects over time. Choose versatile tools and accessories instead of buying a separate kit for every small improvement.
These 10 easy weekend DIY home projects under $100 show that meaningful improvements don’t always require expensive remodeling. A painted front door, updated cabinet hardware, thrifted gallery wall, refreshed piece of furniture, or carefully installed shelf can help your home feel more attractive and comfortable without a major financial commitment.
Start with one small area, measure carefully, and choose materials that suit the existing surfaces. Reuse tools whenever possible, plan for proper drying or curing time, and never compromise safety to meet a budget. With thoughtful planning and a little creativity, a single weekend project can become the beginning of a beautiful home refresh.