

Why is windows 10 not booting and is stuck on a black screen? How to fix windows 10 not booting black screen?
Laptops and personal computers are now used by everyone, because of the increased online work after the pandemic. Working for an office, studying or for watching TV – laptops are being used for everything.
Sometimes unforeseen problems arise while using your system. And one such problem is that your screen is stuck at a black screen and you are unable to boot or restart it. You might be giving a presentation to your colleagues or just doing a little bit of reading and suddenly the screen turns black.
This articles gives you info about the reasons that cause it and ways to fix it too.
Why is Windows not booting stuck on black screen?
The reason for this could be a buggy update that you have recently installed for windows. Some windows updates contain bugs and you need to check the reviews and wait for a stable version. Furthermore, stable versions of the updates will not cause you any kind of problems.
Also, other reasons for this black screen are high load on the computer, monitor driver issue, batter issue or other hardware or software issue.
Fix Windows 10 not booting black screen
If your screen is not displaying anything, try connecting your device to an external monitor to try the methods. Do not panic as soon as you see the black screen. Just follow one of these steps and your windows system will be back to normal.
Step 1 – Force shutdown your computer
This is the first thing any person does when they encounter a problem such as this.
- Press the power button to see if it is helping you turn ON or turn OFF your system.
- Otherwise, try holding down the power button and let the system turn OFF. This is called force shutdown. Wait for a few seconds and then turn it back ON.
- Also, you can try starting your device in safe mode from the BIOS settings on your device. BIOS key is different for different devices. When you see the brand logo of your system, click the F2 or F10 or DEL or F1 depending on your device to enter BIOS mode. Under BIOS you can even troubleshoot hardware and software.
Step 2 – Uninstall recent Windows update
As mentioned before in the article, windows updates are not stable at all times. When they are rolled out at first, you might have problems while doing certain tasks.
- Visit Settings.
- Select Update & Security.
- Then, select Recovery.
- Under this, you will find the option to “Go back to the previous version of Windows 10”.
- Also, this option will only be active if you have done the update less than days ago. If 10 days has passed since the update, this option will be inactive.
Step 3 – Check your display monitor
There might be something wrong with the monitor of you system. Connect your system to an external display which supports casting. Or you can use a HDMI cable to your TV or other external monitor to see if there are problems with your display. Run a diagnostic check from your Windows settings.
Also, if you are connected to an external monitor and unable to view your screen you can try the key combination – Windows Key + ctrl + shift + B. This is supposed to restart your video driver and renew your connection to the external monitor.
Step 4 – Check your wireless display settings
Wireless display is used when you have casted your device to an external display. There are four “project” options available. They are PC screen only, Duplicate, Extend and Second Screen only.
Windows Key + P combination will open the wireless display settings. But, if you were already connected to a wireless display. You can click the key combination and press enter. Try it four times for the four options. Because if the setting was on Second Screen Only, you would not have anything to see on your system.
PC screen only will give you display on your device and not on external monitor. Duplicate is pretty simple, it duplicates your system’ screen to the external monitor. Extend will display some content on your device and the other on the external device.
Step 5 – Open Task Manager on your computer
Task Manager has a lot of options such as Processes, Performance, App History, Startup, Users, Details and Services. The Performance bar will let you see the utilization of memory, CPU, GPU, disk drivers and Wi-Fi on your device.
- Click on the windows icon and type in “Task Manager” and select the option at the top.
- Or you can use the keyboard shortcut for Task Manager which is “ctrl+shift+esc“.
- A window will be opened with the options mentioned in the paragraph above.
- Select the performance bar and check how much of your CPU, GPU and your memory are being used.
- On the top, click on the Processes option and look at all the applications or background processes or windows processes that are running at the moment.
- Right click on the task which you are not using at the moment or which is using a lot of memory and select the option End task.
- Don’t stop any essential tasks. For example if you are running Chrome and you end one of the Google Chrome’s tasks, you will lose progress with the tabs running.
Ending a certain task which is causing a lot of problems on your device, will reduce CPU or GPU usage while also saving memory.
Step 6 – Check drivers for your windows device
Drivers in your device help you speak with other components or the Operating System (OS) running on your system. If you have installed any drivers recently that helped you update certain components, you might want to check those components.
Every computer company created their own website, which caters to the driver need of its customers. For example if your device is HP you can check out this website to download your drivers – https://support.hp.com/us-en/drivers. Once you visit the website you can enter your model number to get the drivers. Or you can follow the instructions given by the website and let it detect the model itself. This way you can et reliable updates.
So if a newer version of the driver is the one that caused the problems, you can roll back to an older one until a stable version is released.
Step 7 – Check if your windows device is heated
Sometimes devices get heated due to some applications or tasks. These tasks might use a lot of memory just to give you a normal experience. For example a high-end game on a low-end system, will let you play the game but at the expense of performance. But, long duration of high memory load causes a lot of issues to your hardware and glitches in your software.
- If you have a cooling fan control on your computer, increase it to the highest speed and also reduce using software and applications causing load on your computer.
- It is important to get yourself a cooling fan for your computer, if that is not in built for your computer. Amazon or Flipkart or online delivery stores have multiple types of cooling fans. Their prices are not high and do not take up a lot of your budget. So, head to your nearest store or buy it online.
Step 8 – Do an antivirus scan
This might not always be the issue for crashes of monitor or software or hardware components. But, it is wise to check for any viruses or malwares on your computer.
- Open Settings on your device.
- Check for Security settings.
- Find the Virus and threat protection and let it scan all the files on your device.
- If it shows you any viruses on your device, it is wise to reset or factory reset your whole device after doing a backup.
Step 9 – Reset your PC
As the picture below shows you, resetting will help you get your PC back to normal.
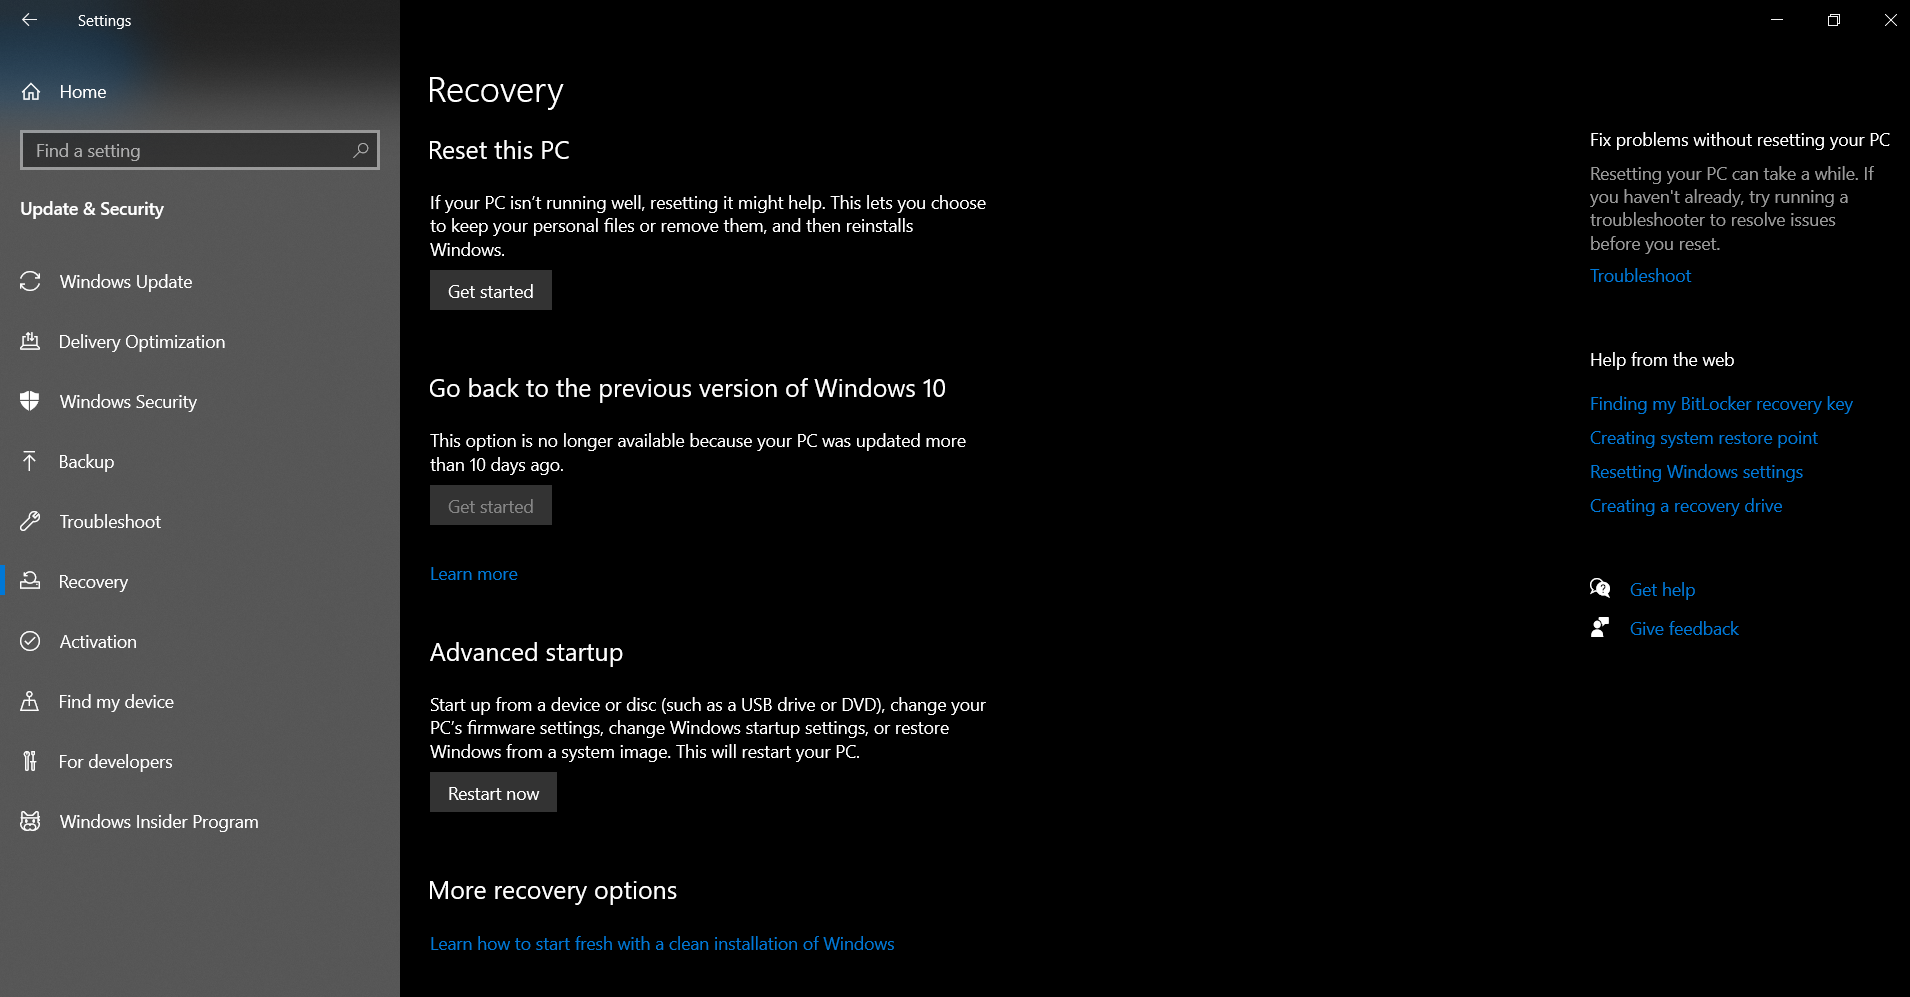
- Visit Settings and select Update & Security.
- Then, select Recovery.
- On the top, you can find the Reset this PC option.
- Click on the “Get Started” option and follow the instructions. Following the instructions you can either choose to delete or save files and then reset your PC.
Step 10 – Contact Windows customer support
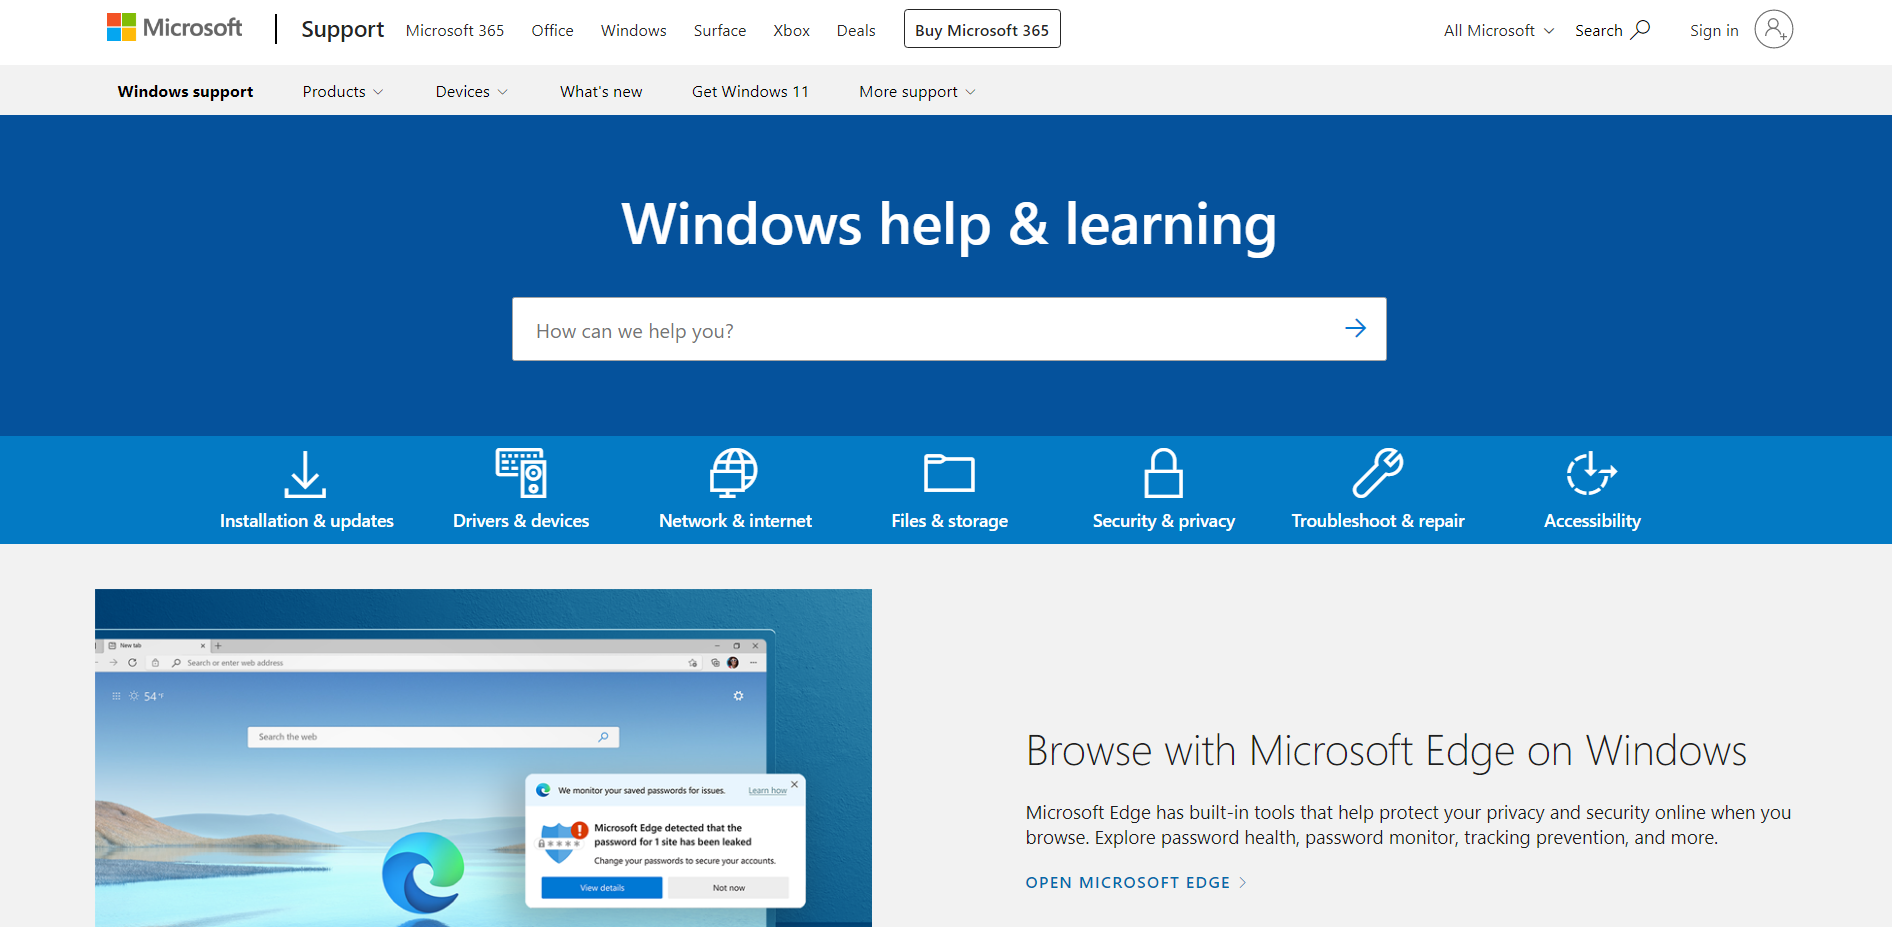
As you can see in the above picture, the Windows Help and Learning or Support pages covers a lot of topics. You can check for updates, read guides or type in your question to get support from Windows community or a customer support representative.
Or you can also contact the customer support of your computer brand and ask them to help you find a solution.
FAQs
Q1. I encounter the black screen issue twice a week and it does not boot easily at that moment. How to fix this?
If you tried all the troubleshooting methods but are still facing this problem, it is time to take your system to a genuine repair shop.
They will help you find the cause, whether it might be a software application or a hardware one or with the OS version itself. And they will help you find the solution for it too.
Q2. Is the black screen issue avoidable?
Yes, it is avoidable. Black screen issue can be caused by a lot of things as mentioned in the article. You can make sure that all your software and hardware are alright. If these are okay, you will not have any issues.
Final Words
This article gives you the causes and fixes for the black screen issue on your Windows 10 systems. I hope the methods mentioned help you circle out and then solve your problem.
Thank you!

Sri Sahith is a B.Tech graduate specializing in Electronics and Communication. He writes articles by ensuring attention to detail. Any kind of technical revelation or news is his jam. Writing and technology are the things he is most passionate about and you can see it in his articles. Also, he loves to read books and talk about them for hours together.


