Your Oculus Link cable won’t connect if your PC doesn’t meet the requirements of the Oculus Quest 2.
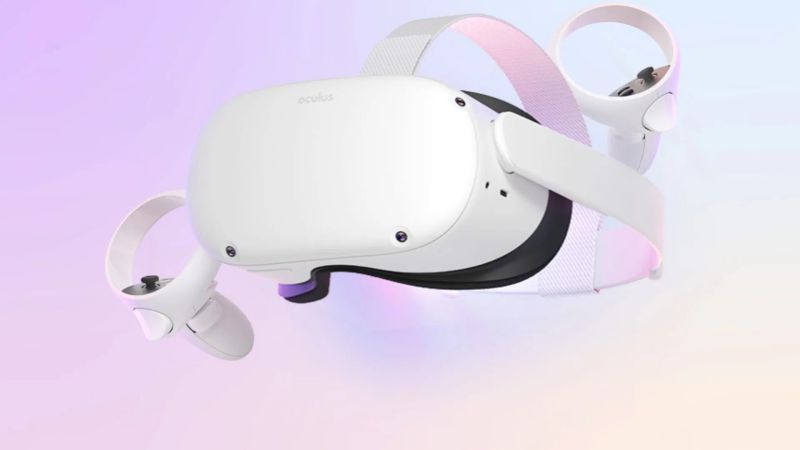
The virtual reality headgear known as the Oculus Quest 2. It is possible to utilize Oculus Link to convert an Oculus Quest 2 into a virtual reality headset for usage on a personal computer.
However, when you attempt to link Quest 2 to your own computer, your personal computer will often not detect it. It’s possible that this is caused by a problem with the program or the hardware.
Why won’t my Oculus Link cable connect?
You will run into the difficulty that is now being discussed if the minimal criteria for your personal computer to support Quest 2 devices are not met.
There is a possibility that the problem is brought on by a malfunctioning USB cable or port. The issue may have been brought on by outdated device drivers, notably those responsible for the USB and graphics drivers.
There is a possibility that the issue is related to the power-saving settings for your USB device.
If your Quest device is experiencing problems, such as damaged data, it is possible that this issue is also the result of those problems.
How to Fix oculus quest 2 link cable not recognized
Method 1: Analyze the Technical Specifications of Your Computer
Verify that your own computer is capable of meeting the requirements posed by your Oculus Quest 2 headsets.
Checking the characteristics of your computer may be done fast by following the steps below:
-
Step 1: Open run dialog
To open the Run dialog, press the Windows logo key and R at the same time on your keyboard.
-
Step 2: After clicking OK, start typing dxdiag.
-
Step 3: Examine the different elements
Examine the Operating System, the Processor, and the Memory of your Computer.
-
Step 4: Select the Display menu option,
Select the Display menu option, and then review the information on your graphics card.
If the requirements of the Oculus Quest 2 headsets are not met by your personal computer, then the headsets will not operate on your personal computer.
Method 2: Examine Your USB Cable/Port
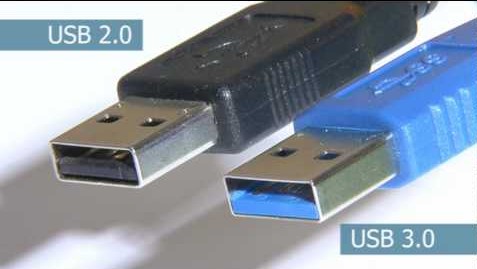
You will also need a high-quality USB cable that allows data transfer as well as power delivery in order to connect your Quest to a personal computer. You have the option of purchasing it directly from Oculus for $79 or using a third-party cable, like as the Anker cable, which is available at a lower cost.
If you are going to get a new cable, you should make sure that the USB cable is at least 3 meters long. This will allow you to have a more pleasant experience and provide you more freedom to move about.
You could also try connecting to a different USB port on your own computer to see whether or not the problem is caused by the USB port.
In the end, you should re-seat the Link cable on both the side of the headset that connects into your PC and the side of the headset that plugs into your PC. This will ensure that all connections to the PC are firm.
Method 3: Verify that the OCULUS Software has the most recent update.
In order to utilize Oculus Link on your own computer, you will first need to ensure that the Oculus program has been loaded and that it is up to current. Simply go to the Oculus Support website, locate the most recent version of the application, and click “Download” to get it.
Method 4: Sign out of your account and then sign in once again
It may not seem like much, but a lot of people have found success with this. It’s possible that the problems you’re having with your Quest might be temporarily resolved by signing out of the PC program and then back in again.
Method 5: Restart Your Devices
You should give this a chance if you haven’t already tried it. A simple restart will reset your program as well as your desktop environment, which in many cases will address problems like this one that have occurred.
Simply turning off both your computer and your Oculus Quest and then turning them back on again will allow you to determine whether or not your PC is able to identify your Oculus Quest.
Method 6: Make sure your USB driver and graphics driver are up to date.
This problem might arise if you are utilizing drivers that are either out of current or not functioning properly, particularly your USB driver and your Graphics driver. Make sure that your device drivers are completely up to date in order to maintain the optimal performance of your accessories in conjunction with your operating systems and apps.
You are able to manually update your device drivers by going to the website of the manufacturer of each device and looking for the driver that corresponds to your specific module on that page.
Method 7: Turn off the Air Link
When transitioning from a wireless Oculus Air Link connection to a conventional cable Oculus Link connection, you run the risk of running into problems such as this one.
Just follow the steps that are outlined below to have it fixed.
-
Step 1: Download your Quest 2 Settings
-
Step 2: Go over to Experimental
-
Step 3: You’ll need to turn off Air Link from that location.
Method 8: Turn off the Power Settings for the USB Devices
You might also try turning off the power saving features for the USB device to see if it helps fix the problem. This is the procedure to follow:
-
Step 1: Launch Run box
On your keypad, press windows logo key and R at the same time.
-
Step 2: Launch Device manager
To launch the Device Manager, type devmgmt.msc followed by clicking the OK button.
-
Step 3: Click on Human Interface Device
After clicking Human Interface Device twice, right-click the USB Input Device, and pick the Properties option from the drop-down menu that appears.
-
Step 4: Go to power management section
In the Power Management section, make sure that none of the choices allow you to save power by selecting them.
Method 9: Reset Your Quest to Factory Defaults
This has the potential to solve several issues with the Quest. However, before you continue, you should be aware that doing so will wipe all of your game data. After this, you will need to download each of your games individually.
Please follow these steps in order to reset your Quest 2 to factory settings:
-
Step 1: Press and hold power button
Until it turns on, press and hold the power button as well as the volume button.
-
Step 2: Click on factory reset
Once you have selected Factory reset, you will need to click the power button to confirm your choice.
-
Step 3: Select yes
After selecting Yes, wipe, and factory reset, you will need to hit the power button to begin the reset process.
FAQs
1. Why won’t the Oculus software install on my Windows 11 computer?
According to Meta, the Oculus software for personal computers is not presently supported by version 11 of Windows. You may, however, give the solutions that are provided below a go and see if any of them are able to help you install the Oculus software on Windows 11:
Make the switch to the stable version of Windows 11 from the insider
Please ensure that you have the most recent version of your Chipset driver installed.
Turn off the Secure Boot, and then start the installation process.
Why is it that I cannot connect my Oculus Quest 2 to my wireless network?
It is most likely that inadequate internet connectivity is the root reason for Quest 2 not being able to connect to WiFi networks. As a consequence of this, check to see that there are no issues with your internet connection and that you are connected to a dependable internet connection. In addition, there is a possibility that issues with your network are contributing to the current predicament. You might try restarting your router by giving it a power cycle or resetting it to the settings it had when it was first manufactured.
2. How can I fix the Oculus PC program that is now installed on my computer?
Fixing the Oculus PC app requires the following:
- Step 1: After going to www.oculus.com/setup, locate the Oculus Rift S section on the page and select the Download software button.
- Step 2: Pick the Repair option.
- Step 3: If Windows prompts you to confirm that you really do want to open this file, choose the option to do so by clicking the Yes button.
- Step 4: If Windows Defender alerts you that your computer is being protected, click the More details button and then click the Run anyhow button.
- Step 5: If you are unable to open the file because your antivirus program is blocking it, temporarily stop your AV software and proceed.
After you have finished making the necessary repairs, go to Step 6 and ensure that your antivirus program is reactivated.
Give the process of downloading and installing the fix some time to work.
Launch the Oculus PC software as the eighth step.

An anime aficionado who also maintains a keen interest in global developments in the fields of technology & gadgets. In her downtime, she can be found trying out all possible varieties of dumplings. A strong believer in animal rights, she can’t help but pet every cat she sees.


