

The Nintendo Switch is one of the most popular game consoles out there for a reason. It’s got some decent specs, it’s easy to use and it has an incredible collection of games.
The added benefit of being able to play games on-the-go with its portable mode, or having a more cinematic experience by connecting it to your TV only makes it a better deal.
Naturally, with a console this versatile, there’s going to be a community of enthusiasts who want to modify it in some way.
Every console has a homebrew community, and the Nintendo Switch is no exception. It’s not quite as simple as jailbreaking an iPhone or installing a custom ROM on an Android device.
In those cases, you don’t need anything more than a computer, the device itself, and a cable to connect one to the other.
How To Use Nintendo Switch RCM Loader
However, for the Nintendo Switch, you have to jump through some more hoops to get what you want. That’s precisely where the RCM Loader comes in.
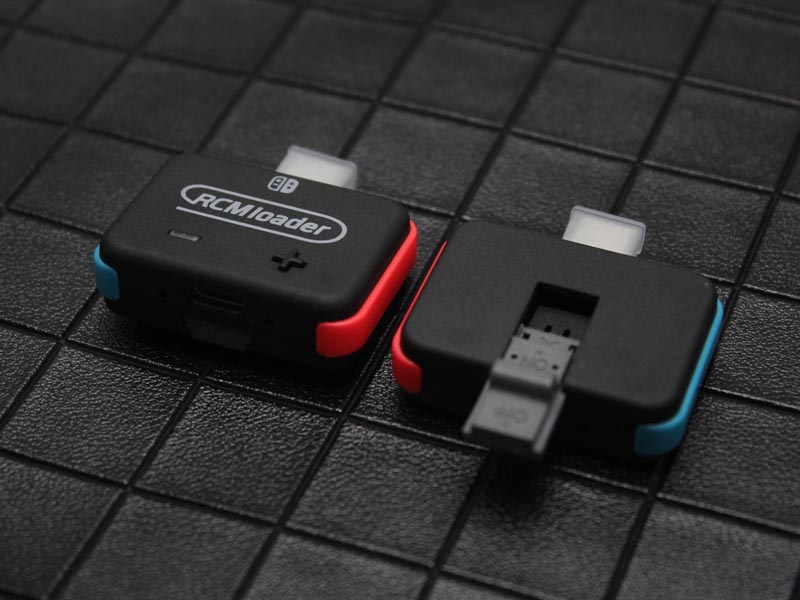
This is a custom hardware dongle that people can use to install custom firmware onto their Nintendo Switch. The dongle comes with three different custom firmware already built into it.
Specifically, it comes with Atmosphere, reinx, or SXOS on board. It also has a handy LED indicator that shows which firmware is currently active.
It’s a bit of a complicated process, but keep reading to figure out how this contraption will help you modify your Nintendo Switch. Before we get to any of that, however, we need to get a few things ready.
First, all the custom firmware on your RCM Loader needs to be updated to the latest version. Then, we need to transfer certain files over to the microSD card that you will insert into your Nintendo Switch.
To learn how to do both of these things, check out this wonderful tutorial here. Once all the files are in place, we can finally get to the Nintendo Switch itself. Here’s what you need to do at this point.
Step 1 – Power off your Nintendo Switch
You need to power off your Nintendo Switch first. Press and hold the Power button for 3 seconds to open the Power Menu. And select Power Off option.
Step 2 – Insert the RCM jig
Remove the right Joycon from the console. Then, insert the RCM jig that comes with the dongle into the groove.
Step 3 – Press Volume Up + Power button
At this point, press the volume up button on the Switch, followed by the power button.
Step 4 – Connect RCM dongle to charging port
Once that’s done, connect the RCM dongle to the USB-C charging port at the bottom of the Switch.
Step 5 – Remove the RCM jig
You may notice some text flashing on the Nintendo Switch’s screen. When you do, you can remove the RCM jig and the dongle and reattach your right Joycon controller.
Conclusion:
You now have a Nintendo Switch with custom firmware installed on it. This will let you do a variety of things, like running homebrew applications and even use external hard drives to store your games. Do keep in mind that certain custom firmware requires a paid license for you to be able to use them.
Additionally, not every Nintendo Switch is hackable through this method. You need to take a look at your Switch’s serial number to see if yours is. If it is, we hope that this guide helped you out. In case there is something you are confused about, feel free to ask about it in the comments.

Technical writer and avid fan of cutting-edge gadgetry, Abhishek has authored works on the subject of Android & iOS. He’s a talented writer who can make almost any topic interesting while helping his viewers with tech-related guides is his passion. In his spare time, he goes camping and hiking adventures.


