

If you want to know why your Hitachi TV screen is black and there’s no picture, you’ve come to the right place.
The televisions in our homes have developed into indispensable devices that not only keep us entertained but also keep us informed. However, experiencing a blank screen with no picture may be quite aggravating, especially if it occurs on your much-loved Hitachi TV.
In this complete guide to troubleshooting, we will investigate the possible causes behind this issue and present step-by-step methods to assist you in reviving your Hitachi TV. We hope that this information will be helpful to you. You may save both time and money by addressing the issue on your own if you follow the procedures outlined in this troubleshooting guide.

Hitachi TV turns on but no picture
Short answer: Hitachi TV turns on, but there’s no picture. This could be because of a problem with the power source, software or firmware, overheating, faulty cables, or hardware.
Reason 1 – Power supply issue
It is possible that the television will not be able to switch on or function normally if it does not receive sufficient or stable electricity. A malfunctioning power cord, power outlet, or internal power supply unit could be the cause of this issue.
Reason 2 – Software or firmware problem
If the software or firmware of the television is out of date, corrupted, or incompatible with the hardware of the television or the source of the input signal, the television may display a variety of difficulties, including a black screen. This may could place if you interfere with the process of updating the program.
Reason 3 – Overheating issues
Overheating is another possible reason to examine when a Hitachi TV turns on but does not show a picture. Televisions are technological equipment that might have their performance hampered if they overheat. The picture-processing and display components within can be damaged by overheating.
Reason 4 – Faulty cables
It’s possible that a bad cable connection is to blame for your Hitachi TV’s erratic picture quality if it flickers or appears randomly. The shaky connection may cause the transmission of video signals to become garbled, which will result in a picture presentation that is not consistent.
Damaged wires can result in a variety of visual anomalies, including pixelation, artifacts, and distorted colors on the display.
Reason 5 – Hardware problems
If the physical components of the television, such as the display panel, the backlight, or the T-CON board, malfunction, degrade, or fail, the television might not be able to display a picture or produce sound. This could be the result of a number of circumstances, including age, general wear and tear, impact, or the surrounding environment.
Fix: Hitachi TV black screen, no picture
Method 1 – Make sure the input source is correct
It is possible that you will not be able to see an image or hear any sound if the TV is set to the incorrect input source, or if the device that is connected to it is not configured or selected correctly. If you hook up a cable box to the TV but don’t select the proper HDMI input, you won’t see anything on the screen.
In case your TV’s source is a streaming, cable, or other device, verify that you have set it to use HDMI 1. You can try out each potential input source until you find the one that works best. To check if the image shows, start with the first input source and wait a few seconds. If the photo still isn’t working, try a different input and keep trying till you find the right one.
Method 2 – Soft reset the TV
Restarting your Hitachi TV, also known as a soft reset or reboot, allows the television’s software to be updated and eliminates any temporary hiccups or faults. This technique assists in resolving software-related difficulties, which are possible causes of the problem with the black screen and no picture.
- Step 1- Unplug the television.
- Step 2- Press and keep holding the Power button on the remote control for 30 seconds.
- Step 3- Connect the television set to the power outlet again.
- Step 4- Next, to switch on the Hitachi TV, either hit the power button on the TV itself or the power button on the remote control. Please wait a few moments while it boots up.
Method 3 – Check HDMI Cable Connection
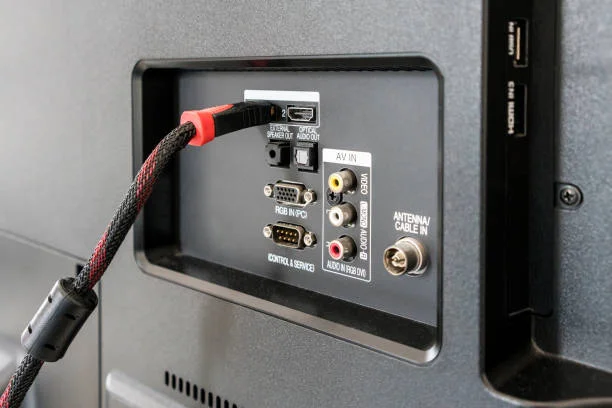
The High-Definition Multimedia Interface (HDMI) cable is the principal medium over which high-quality video and audio information can be transmitted from external devices to your Hitachi TV. A black screen with no picture can be the result of an HDMI cable connection that is either loose or not secure.
Inspect the HDMI cable with extreme caution for any obvious signs of wear and tear, such as fraying, kinks, or bent pins. If you find that the HDMI cable has been damaged in any way, you should think about purchasing a new one. The transmission of the signal can be disrupted and picture-related issues can arise if the wires are damaged.
If you have a spare HDMI cable, you might try connecting your device to the TV with that instead of the original cable to see if that fixes the problem.
Method 4 – Experiment with different external devices
Finding the cause of the black screen requires testing several external and streaming devices. You can rule out the TV as the source of the problem by testing it with other devices.
Try switching to a different streaming device, like a Roku or Fire Stick, to see if it helps. The streaming device and the TV may not be compatible if the black screen only appears when using that device.
- Step 1- Connect a second external device via the HDMI port.
- Step 2- Check that the Hitachi TV’s input source is set correctly and see if you have a picture.
- Step 3- If the image and sound are working, the problem lies with the connected device’s video output.
- Step 4- If you still hear sound but the screen is blank, the problem lies either with the HDMI port on the television or with the television itself.
Method 5 – Change the input Settings
The input settings of a Hitachi TV influence how the TV identifies and displays video signals coming from devices that are external to the TV. Incorrect input settings can result in a screen that is completely black with no picture.
Follow these procedures to check and make any necessary adjustments to the input settings on the TV:
- Step 1- Simply press the button labelled “External Power Source” on the remote control.
- Step 2– Click the “Input Settings” option.
- Step 3– Check each of the TV inputs to ensure that it is set to the “Enabled” position.
- Step 4– Return to the Input Settings menu.
- Step 5- Check to see that the other input source settings are operating normally.
- Step 6- Now make sure to save the settings
- Step 7- Restart the TV
Method 6 – Update the TV firmware
It is absolutely necessary to keep the firmware of your Hitachi TV up to date because doing so delivers upgrades, problem fixes, and increased compatibility with devices connected from the outside. A black screen with no picture can be the result of using outdated firmware, which can also cause other software-related problems.
Let’s have a look at the detailed methods that will help you update the firmware on your Hitachi TV in order to resolve the issue with the black screen and no picture:
- Step 1- Use the TV remote control to travel to the settings menu of the Hitachi TV, then select Settings from the menu.
- Step 2– Proceed to the Select Support menu.
- Step 3- Choose to Update Your Software.
- Step 4- Click the Update Now button.
- Step 5- The television will go through a restart so that the updated firmware can take effect.
Method 7 – Disable Power Saver and Sleep Timer
Hitachi televisions come equipped with features known as Power Saver and Sleep Timer, which allow users to choose energy-saving settings and automated shut-off. On the other hand, these settings may occasionally cause the TV’s regular operation to be disrupted, which will then result in a screen that is completely black and devoid of any picture.
These are the procedures that need to be taken in order to disable these settings:
- Step 1– To access the menu, use the “Home” button located on the remote control.
- Step 2- Navigate to the settings menu on the TV.
- Step 3- Choose time and then choose the Sleep Timer or you can choose the Power Saving option from the menu.
- Step 4- Use the arrows to switch it to the Off position.
Method 8 – Check Hitachi TV for Voltage Variations
Power surges, electrical instability, and insufficient power supply are some of the potential causes of voltage fluctuations. These variations can have a severe impact on electronic devices like your Hitachi TV, leading to a variety of problems including a black screen and no picture in some cases.
Use a voltage stabiliser or surge protector. These gadgets can shield your television from the effects of power surges and fluctuations in voltage. It is imperative that you make use of a voltage stabiliser or surge protector that is suitable for the power requirements of your television.
Method 9 – Ensure the Hitachi TV T-CON Board is working properly.
The T-CON board takes in incoming video signals and processes them so they may be shown. The T-CON board, situated beneath the primary circuit board, is responsible for generating the picture’s horizontal and vertical lines. If the T-CON board is broken, the display will be blank.
When the T-CON board fails, the backlight will be significantly less bright than usual. As a result, the colors become muted and muted.If the T-CON Board on your Hitachi TV is broken, A replacement T-CON board can be purchased and installed in lieu of the broken one.
Method 10 – Call a professional TV repairman to fix LED backlight strips.
The screen is illuminated by LED backlight strips, which are also responsible for delivering the appropriate level of brightness for image display. If these strips are broken or damaged in any way, they have the potential to cause the screen to be completely black with no picture.
The image quality suffers if an LED backlight fails, which results in the picture becoming dimmer and more fuzzy than normal. It is not simple to disassemble the Hitachi TV, which is required in order to change the LED backlight strips inside of the television.
It is strongly recommended that you engage a member of Hitachi’s service team to fix the backlight strips, as attempting to do so on your own may result in additional problems.
Method 11 – Change TV batteries
Altering the batteries in the remote control is another option that you have available to you. Sometimes, a problem with a black screen might be caused by a dead or low battery in the remote, which can prevent the TV from responding to commands from the remote. This can also cause the screen to remain black.
Method 12 – Plug into another wall outlet
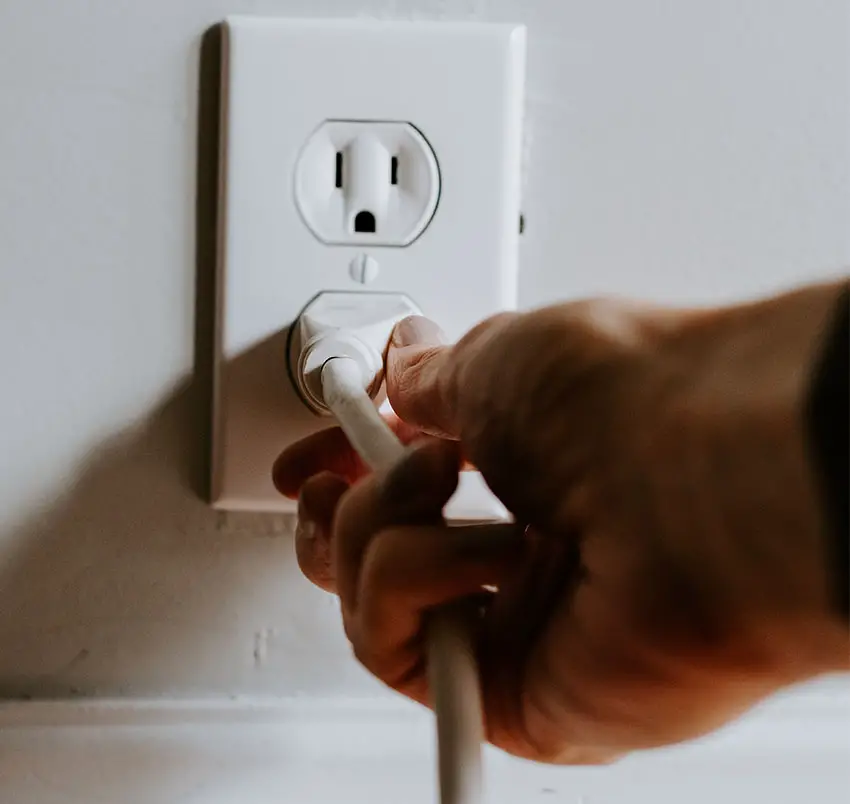
Your Hitachi TV gets its power from the wall socket; if that outlet is damaged or doesn’t provide enough juice, your TV won’t turn on or display anything.
A blank screen may be the consequence of a problem with the TV’s power source or with the original electrical outlet. You can find out if the problem is with the outlet itself by trying to connect the TV to a different one.
Method 13 – Factory reset the TV
Your Hitachi TV can be returned to its initial factory settings by performing a factory reset. This will also clear any customised settings or configurations that may be the root of the problem with the black screen and no picture.
Many issues that are brought on by software flaws can be fixed by resetting the Hitachi TV to the settings it had when it was first manufactured. Because a factory reset deletes all personal information that has been saved on the TV, including passwords, usernames, and favourites, this is one of the last software-based remedies that you should consider before moving on to hardware fixes.
If your Hitachi television has a black screen, then follow these steps to conduct a factory reset:
- Step 1- To access the menu, use the “Home” button located on the remote control.
- Step 2– Go to the Settings menu.
- Step 3- Choose the Support option.
- Step 4– Choose to perform a self-diagnosis.
- Step 5- Click the Reset button.
- Step 6- When prompted for the Security Pin, enter 0000.
- Step 7- And then confirm the factory reset.
On the other hand, it is possible that you will not be able to access the menus if the screen is black. Using the remote control, you can factory reset the TV
Using the remote to reset the Hitachi TV:
- Step 1- Hold down the “Exit” button on the remote for 15 seconds.
- Step 2– To initiate a complete reset, just hit the OK button.
Second way to factory reset
- Step 1– Simply hold down the remote’s Info, Menu, and Mute buttons for five seconds to enter setup mode.
- Step 2- Then, on the remote, press the numbers 8 and 2 to begin the reset procedure.
Method 14 – Contact support
If you have gone through all of the troubleshooting methods for your Hitachi TV and the problem with the black screen is still occurring, you may need to get in touch with Hitachi support to for more assistance.
You can get in touch with Hitachi’s customer care by going to their website and locating the relevant contact information for your area.
SEE ALSO:
Final Words
When you turn on your Hitachi television and see only a black screen with no picture, it can be upsetting, but it is imperative that you keep your cool and follow the troubleshooting methods that are explained in this tutorial.

Technical writer and avid fan of cutting-edge gadgetry, Abhishek has authored works on the subject of Android & iOS. He’s a talented writer who can make almost any topic interesting while helping his viewers with tech-related guides is his passion. In his spare time, he goes camping and hiking adventures.


