

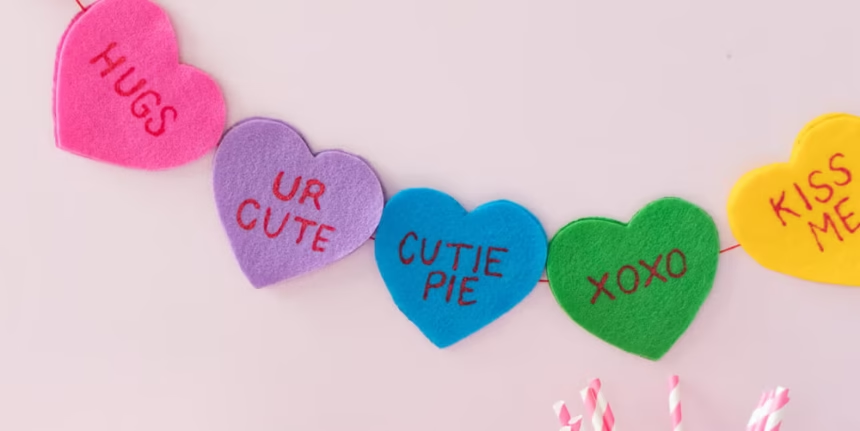
Remember those adorable pastel conversation heart candies with tiny romantic messages? You can turn that nostalgic Valentine’s Day favorite into a beautiful handmade banner using simple craft supplies. A DIY conversation heart banner is perfect for decorating a fireplace mantel, bedroom wall, classroom, party table, or cozy Valentine’s corner.
In this tutorial, you’ll learn how to make a conversation heart banner for Valentine’s Day using two creative methods. The first uses pastel cardstock and vinyl lettering for a crisp, colorful finish. The second uses soft felt and dimensional fabric paint for a cozy, reusable decoration. Both methods are divided into six practical steps, giving you 12 easy steps to follow, along with budget alternatives, decorating ideas, and helpful tips for making your banner look beautiful.
Affiliate disclosure: As an Amazon Associate, I earn from qualifying purchases. This article contains affiliate links, which may earn us a commission at no extra cost to you.
More Valentine’s Day DIY Decoration Ideas
A handmade conversation heart banner looks lovely alongside a simple wreath, paper decorations, or a romantic tabletop display. Explore these related decorating ideas for more inspiration.
- 13 Dollar Store Valentine’s Day Decorations for inexpensive handmade hearts, wreaths, and garlands.
- 14 Stunning Valentine’s Day Decor Ideas for decorating mantels, bedrooms, entryways, and party spaces.
Quick List: 12 Steps to Make a Conversation Heart Banner
Method 1: Pastel Cardstock Conversation Heart Banner
- Choose and customize your conversation heart designs.
- Cut pastel hearts from glitter or smooth cardstock.
- Create the conversation heart messages.
- Arrange the hearts in a balanced color pattern.
- Attach the words neatly to each cardstock heart.
- Thread the hearts onto ribbon or yarn.
- Choose felt colors and prepare a heart template.
- Cut matching felt heart pieces.
- Lay out the felt hearts in your preferred sequence.
- Attach the string between the felt layers.
- Paint conversation heart messages on the felt.
- Let the banner dry and hang it for Valentine’s Day.
Which Conversation Heart Banner Should You Make?
Both versions recreate the cheerful look of conversation heart candy, but they use different materials and decorating techniques. Choose the one that fits your supplies, skill level, and preferred appearance.
| Feature | Cardstock Banner | Felt Banner |
|---|---|---|
| Main Material | Glitter or Smooth Cardstock | Colored Craft Felt |
| Lettering | Iron-On Vinyl, Adhesive Vinyl, or Marker | Dimensional Fabric Paint |
| Main Tools | Scissors or Cutting Machine | Scissors and Fabric Glue |
| Finished Appearance | Crisp, Flat, and Colorful | Soft, Textured, and Handmade |
| Best Use | Party Backdrops and Mantels | Bedrooms, Shelves, and Cozy Decor |
| Beginner Alternative | Hand-Cut Hearts With Marker Letters | Hand-Cut Hearts With Fabric Paint |
| Reusable | Yes, With Careful Storage | Yes, With Careful Storage |
Supplies You’ll Need for a DIY Conversation Heart Banner
Gather your supplies before starting. You only need the materials for your chosen method, so there’s no reason to purchase everything on both lists.
For a Cardstock Conversation Heart Banner
- Pastel glitter cardstock or smooth colored cardstock.
- Cricut, Silhouette, or another compatible cutting machine, if available.
- Heart-shaped template and scissors for the no-machine method.
- Red heat-transfer vinyl for compatible glitter cardstock, or adhesive vinyl for suitable smooth cardstock.
- Compatible heat press and protective pressing surface, if using iron-on vinyl.
- Craft markers or pens as a simple lettering alternative.
- Ribbon, cotton string, or soft yarn.
- Hole punch, ruler, and appropriate craft tools.
For a Felt Conversation Heart Banner
- Craft felt in several pastel colors.
- Paper or cardboard heart template.
- Sharp fabric scissors.
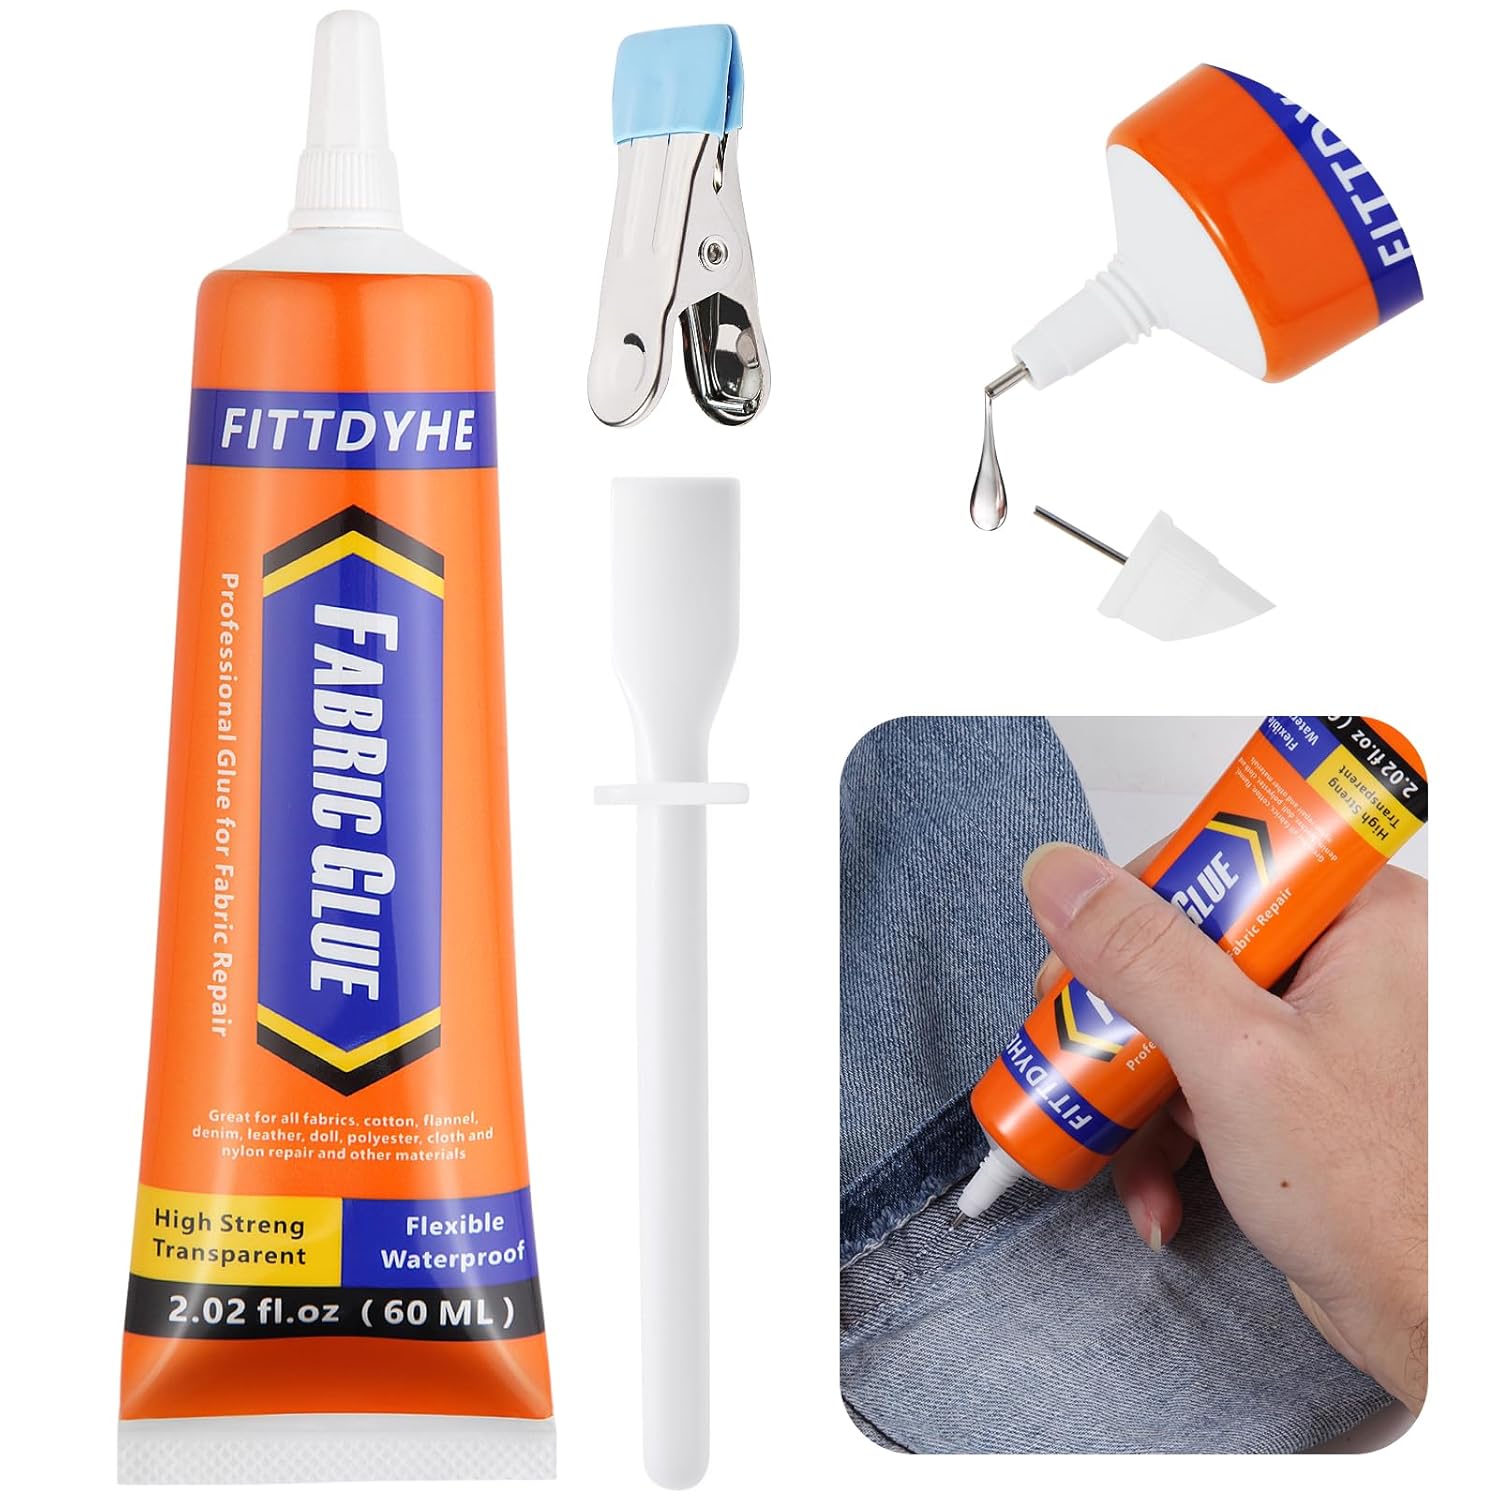
- Fabric glue suitable for felt.
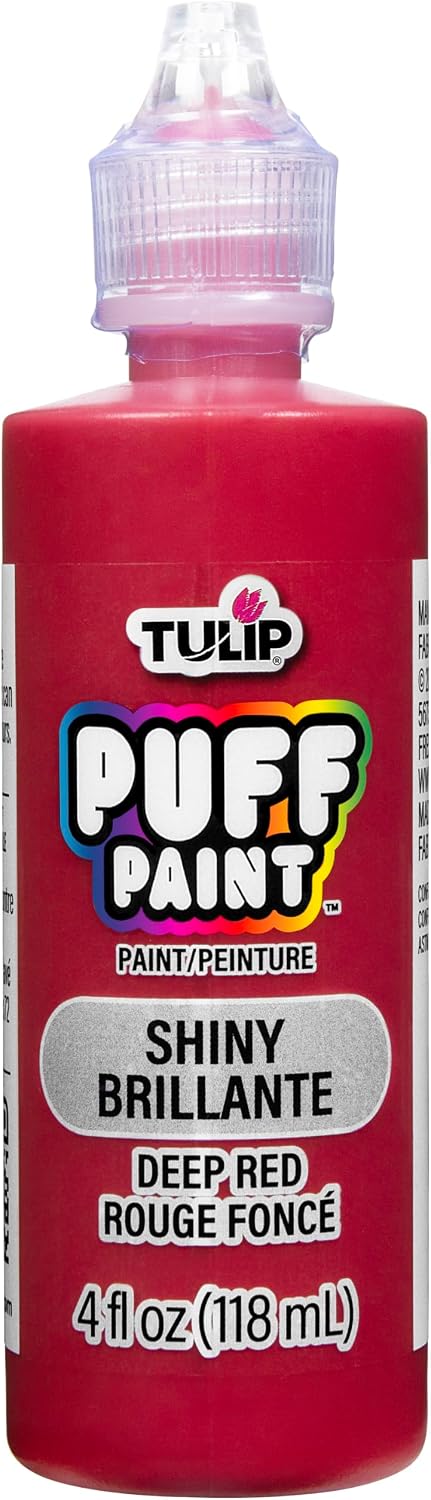
- Red dimensional fabric paint with a fine writing tip.
- Sturdy string, ribbon, or cotton cord.
- Ruler, pencil, and scrap paper for practicing lettering.
- A flat protected surface where the paint can dry undisturbed.
Method 1: How to Make a Pastel Cardstock Conversation Heart Banner
A cardstock conversation heart banner gives you the recognizable look of pastel candy hearts with bold red messages. Glitter cardstock makes the hearts sparkle, while smooth cardstock produces a more understated finish. You can use a cutting machine for crisp, consistent shapes or cut the hearts by hand.
1. Choose and Customize Your Conversation Heart Designs
Start by deciding how long you want the banner to be and how many hearts will fit across your display area. A short mantel banner might use six to eight hearts, while a longer party backdrop can use ten or twelve. Choose a simple, rounded heart shape inspired by traditional conversation heart candies. The broad center gives you enough space for short messages.
If you’re using a Cricut or Silhouette, create one heart shape in your design software and duplicate it for consistent sizing. Add two small holes near the upper outer edges if you plan to thread the finished hearts onto yarn. Make the openings large enough for your chosen ribbon or cord. For hand-cutting, draw one heart on cardboard, cut it out, and use it as a template for the remaining pieces. Approximately four-inch-wide hearts make a useful starting size, but adjust them to suit your space.
Design tip: Use the same heart template for the entire banner. Consistent shapes help the finished decoration look neatly arranged even when the colors and messages are different.
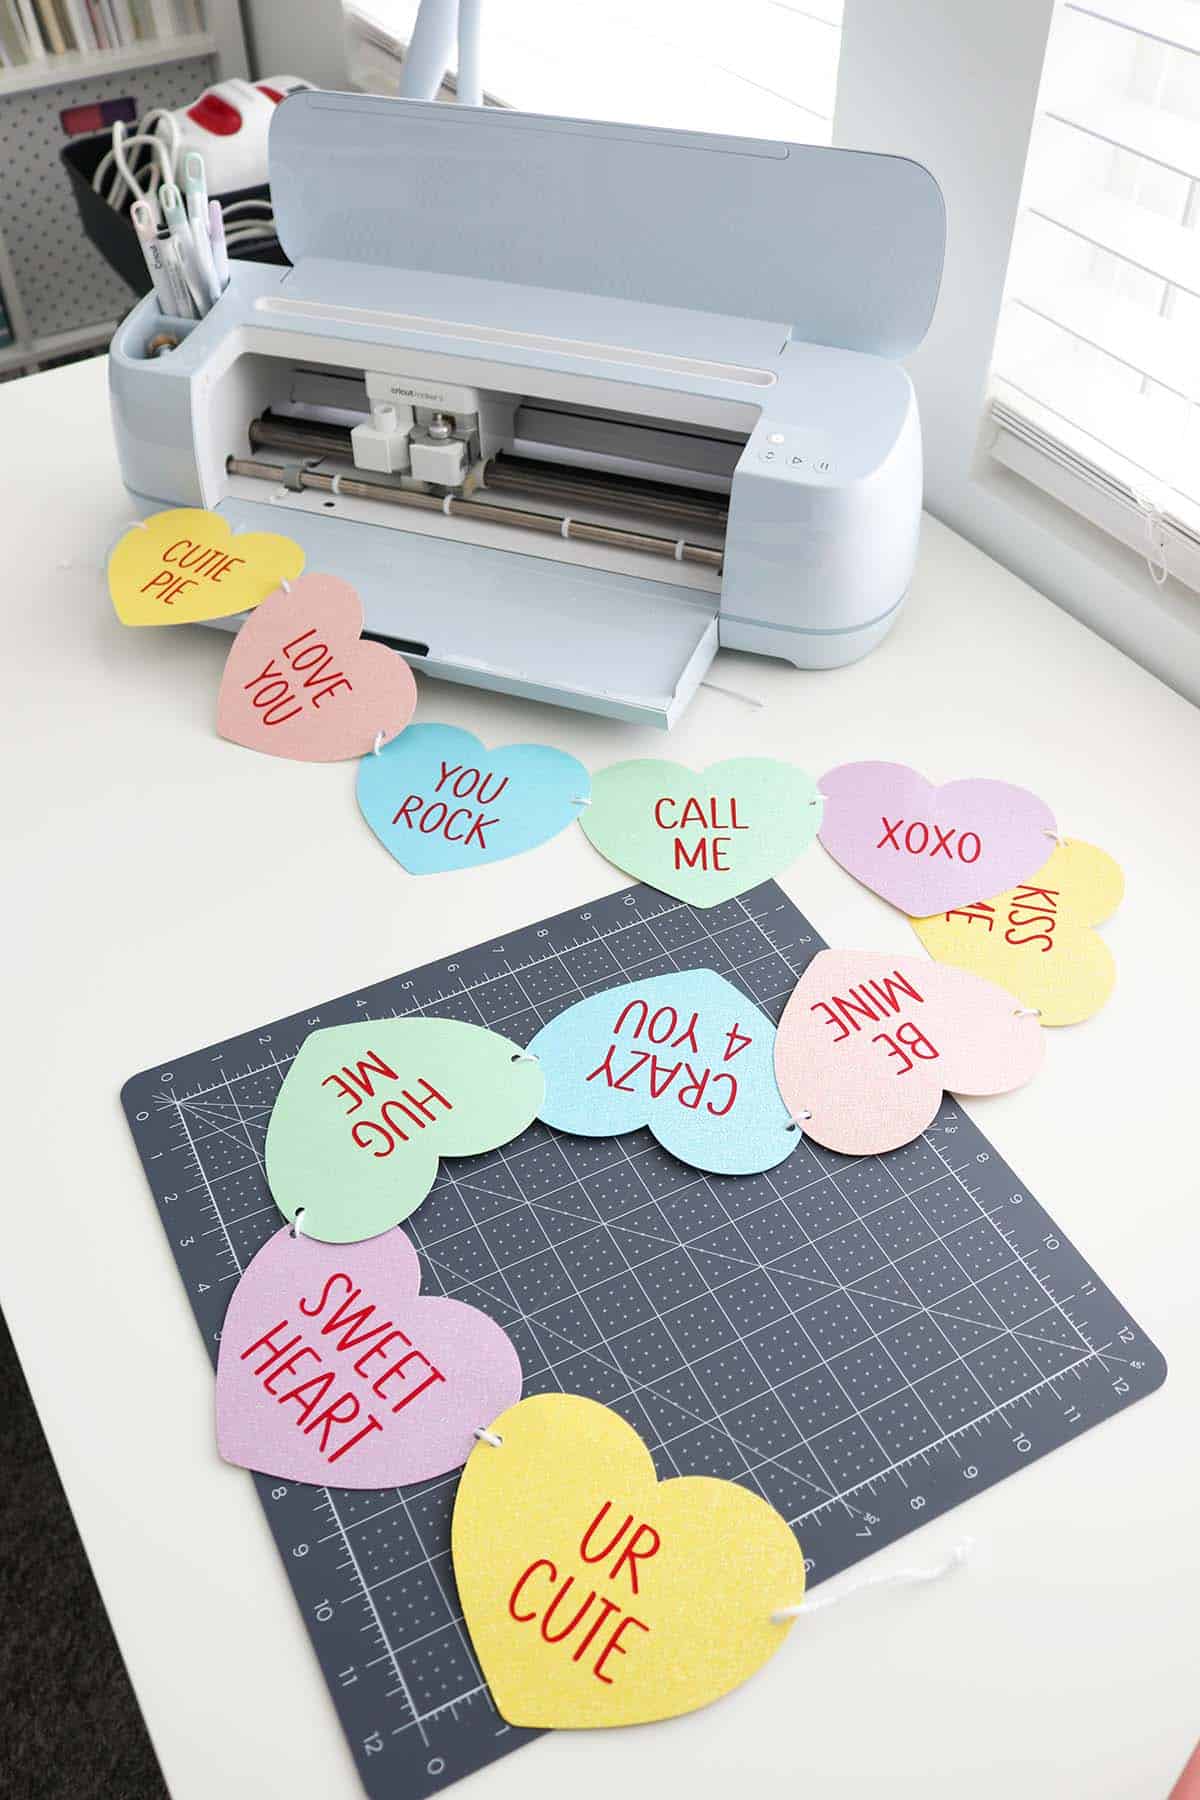
Image credit: @aubreeoriginals.com
2. Cut Pastel Hearts From Glitter or Smooth Cardstock
Traditional conversation heart candies come in soft pastel shades, so this is a lovely opportunity to use blush pink, lavender, pale yellow, mint, and light peach. Glitter cardstock adds a playful sparkle that works beautifully for Valentine’s parties, while matte cardstock gives the banner a cleaner, more classic appearance.
Place the cardstock on a suitable cutting mat and select the material setting recommended for its thickness and finish. Glitter cardstock may require a different cutting pressure than smooth paper, so test one small shape before cutting the entire batch. If you’re working by hand, trace your template onto the back of the cardstock and cut each heart carefully with scissors. Punch the threading holes in matching positions on every heart. When removing machine-cut cardstock, peel the cutting mat away from the paper carefully to reduce curling.
Budget tip: Use cardstock scraps from previous projects and cut the hearts in different colors. You don’t need specialty glitter paper to make the banner attractive.
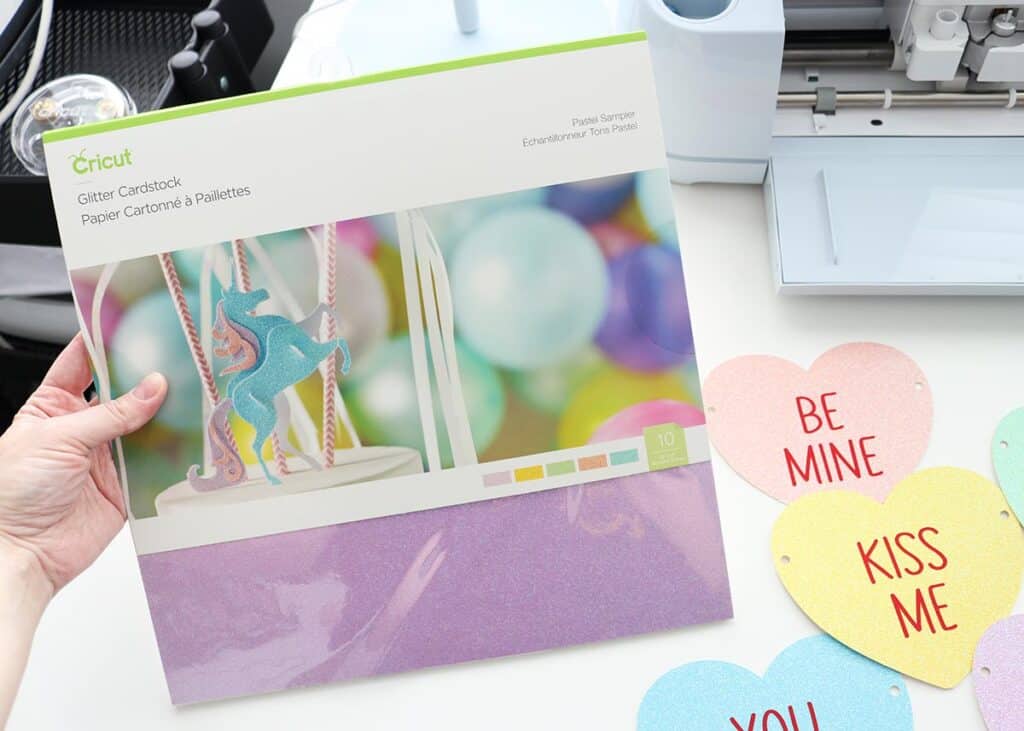
Image credit: @aubreeoriginals.com
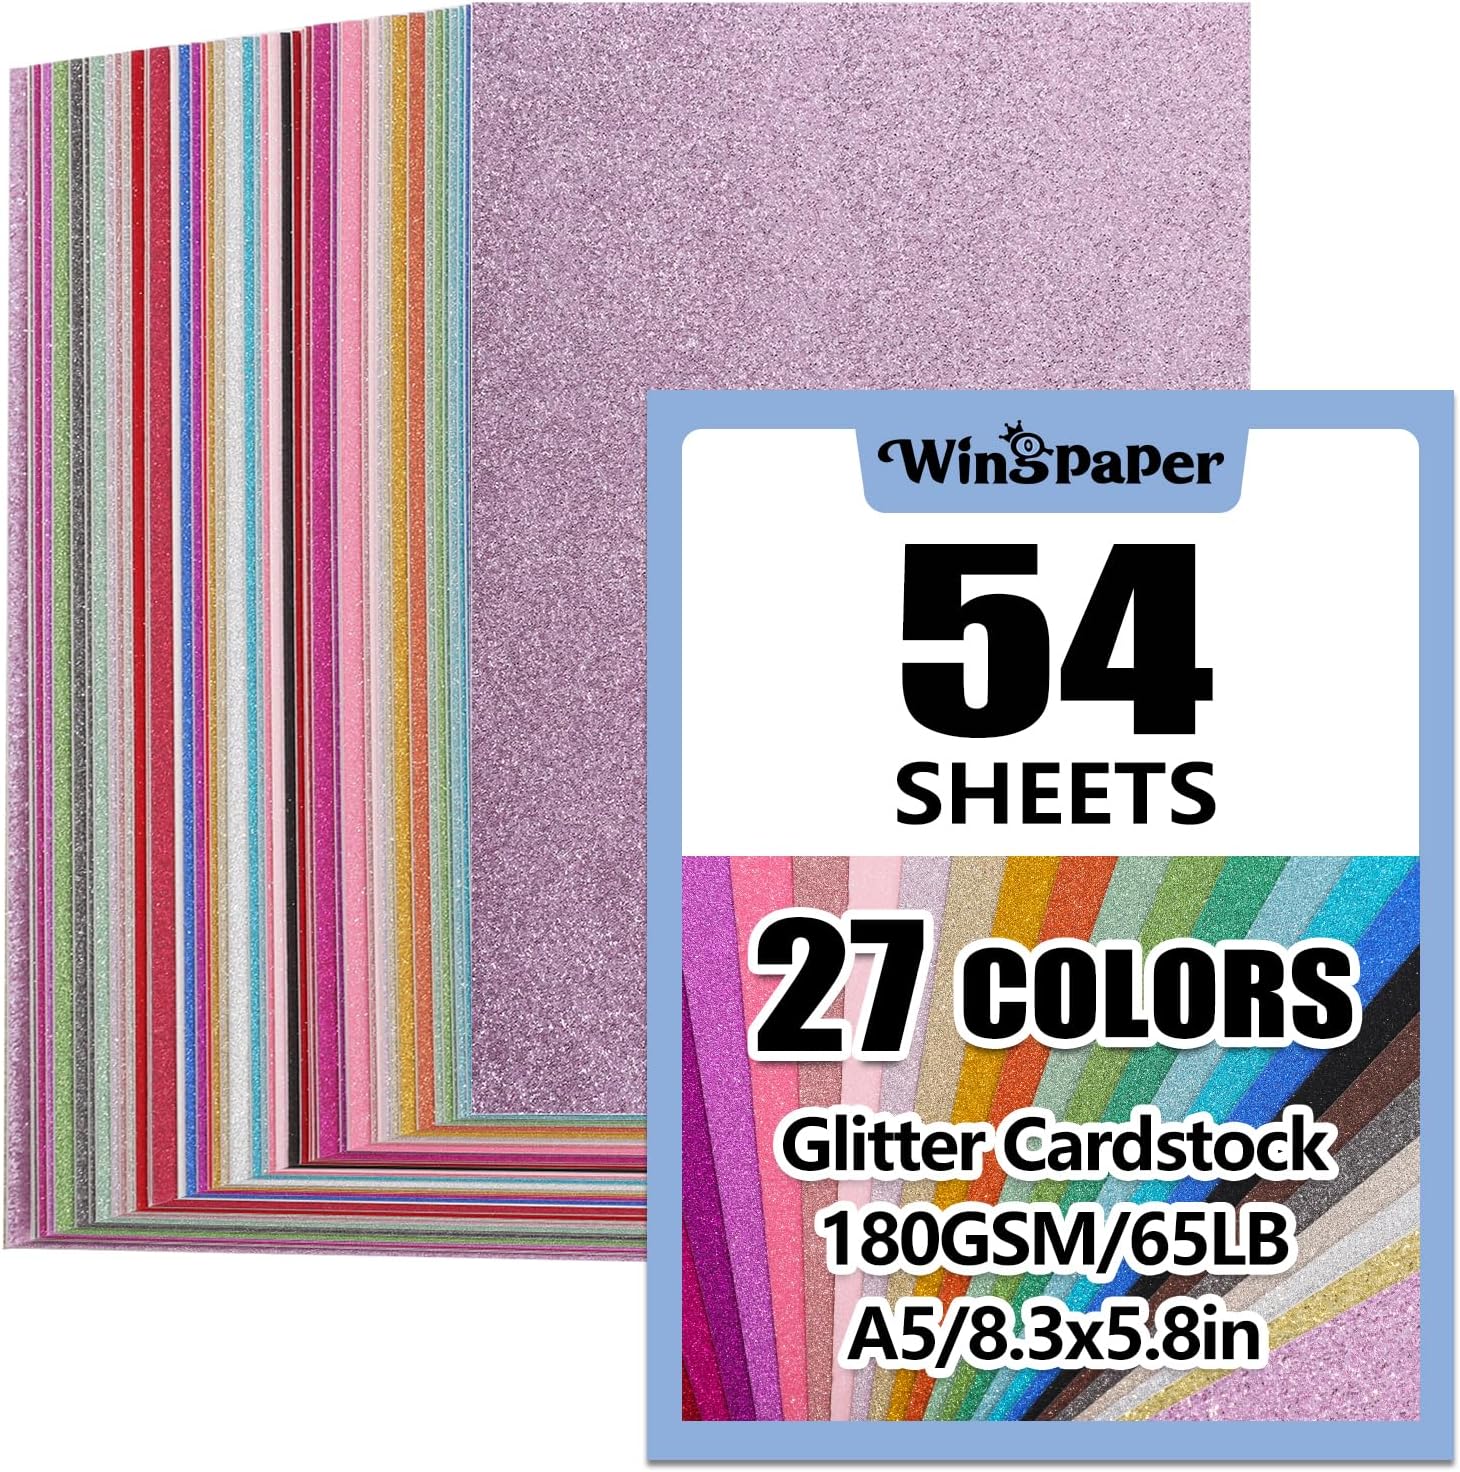
Amazon Find: Pastel Glitter Cardstock Paper
Pastel glitter cardstock adds sparkle and helps recreate the colorful appearance of conversation heart candies. Check the paper weight and cutting-machine compatibility before ordering.
3. Create the Conversation Heart Messages
The messages are what make a conversation heart banner so recognizable. Keep the words short, playful, and easy to read. Phrases such as BE MINE, HUG ME, XOXO, LOVE YOU, CUTIE PIE, and YOU ROCK are especially suitable for a festive display. Using all-uppercase lettering can help the words resemble the familiar candy designs.
For a cutting-machine project, create the text in a bold, simple font and size it to fit inside each heart with a clear margin around the edges. If you plan to use iron-on vinyl, mirror the text before cutting when the material requires it. Cut the lettering, then remove the surrounding excess vinyl using suitable weeding tools. If you’re using smooth cardstock, permanent adhesive vinyl or a marker can be a simpler alternative. Avoid assuming adhesive vinyl will stick securely to textured glitter cardstock, since the uneven surface can prevent reliable adhesion.
Lettering tip: Use one font throughout the banner. Thick lettering is generally easier to read and work with than delicate script fonts, especially when each heart contains only a few words.
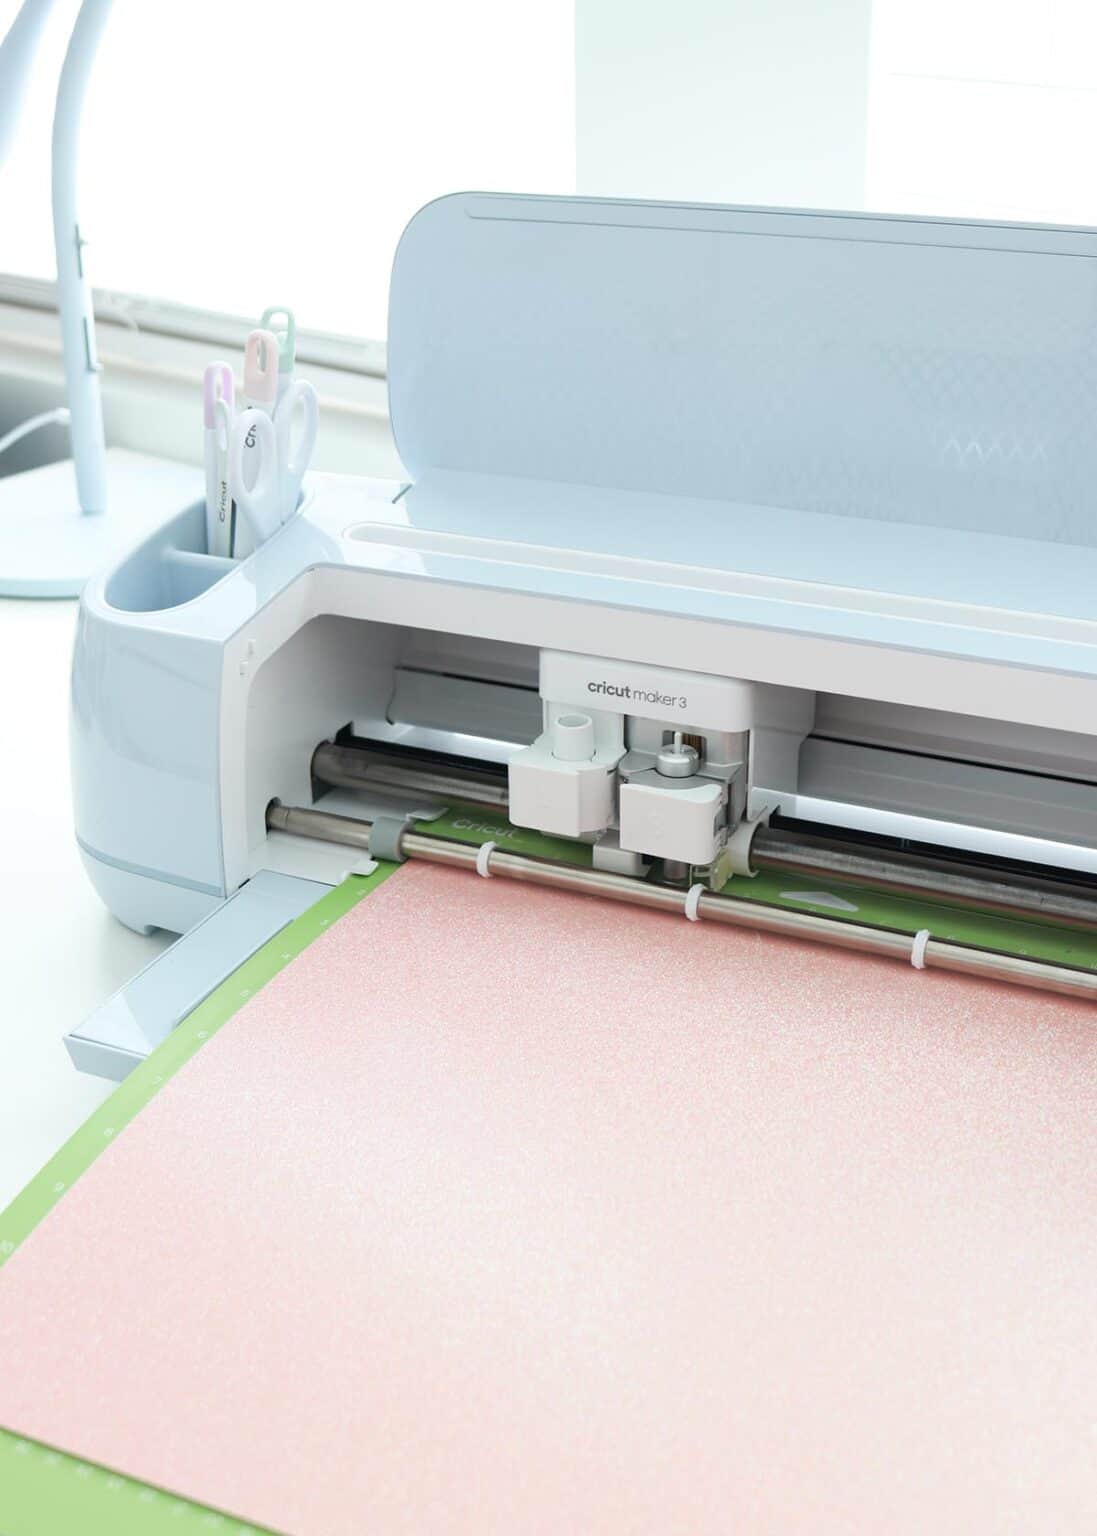
Image credit: @aubreeoriginals.com
4. Arrange the Hearts in a Balanced Color Pattern
Before attaching the words, lay all the hearts across a table and decide the order in which they’ll appear on the banner. This simple step makes a difference because it helps you avoid placing too many similar colors or messages next to one another. A thoughtful sequence makes the finished decoration look cheerful and organized.
Start with a pale pink heart, followed by lavender, mint, yellow, and peach. Repeat the colors if you have a longer banner. Place different messages on neighboring hearts so the lettering feels varied. For example, alternate a two-word phrase with a shorter design such as XOXO. If you prefer a more coordinated appearance, use only three shades and repeat them in the same sequence. Leave enough room between the hearts to see each outline clearly when the banner is hanging.
Styling tip: Take a quick photograph of the layout before attaching the lettering. This gives you a useful reference when assembling the banner later.
5. Attach the Words Neatly to Each Cardstock Heart
Once you’ve chosen the color order, add the conversation heart messages. Centered lettering helps each piece resemble the classic candy design. The best application method depends on your cardstock, vinyl, and available tools, so always check compatibility before attaching the text.
For suitable smooth cardstock, apply adhesive vinyl using transfer tape and a gentle burnishing motion. If you’re using glitter cardstock and compatible iron-on vinyl, follow the material manufacturer’s recommended heat, pressure, and pressing time on an appropriate protective surface. Make a test piece first because excessive heat can warp cardstock or damage the finish. Use a low-temperature approach only when supported by the products involved, and never assume the same setting works for every glitter paper. Let each heart cool flat before handling. For a no-machine project, write directly on smooth cardstock with a fine-tip paint marker or permanent craft marker after testing for smudging.
Practical tip: Keep the letters clear of the threading holes. This prevents the ribbon from covering part of the message when the finished banner is assembled.
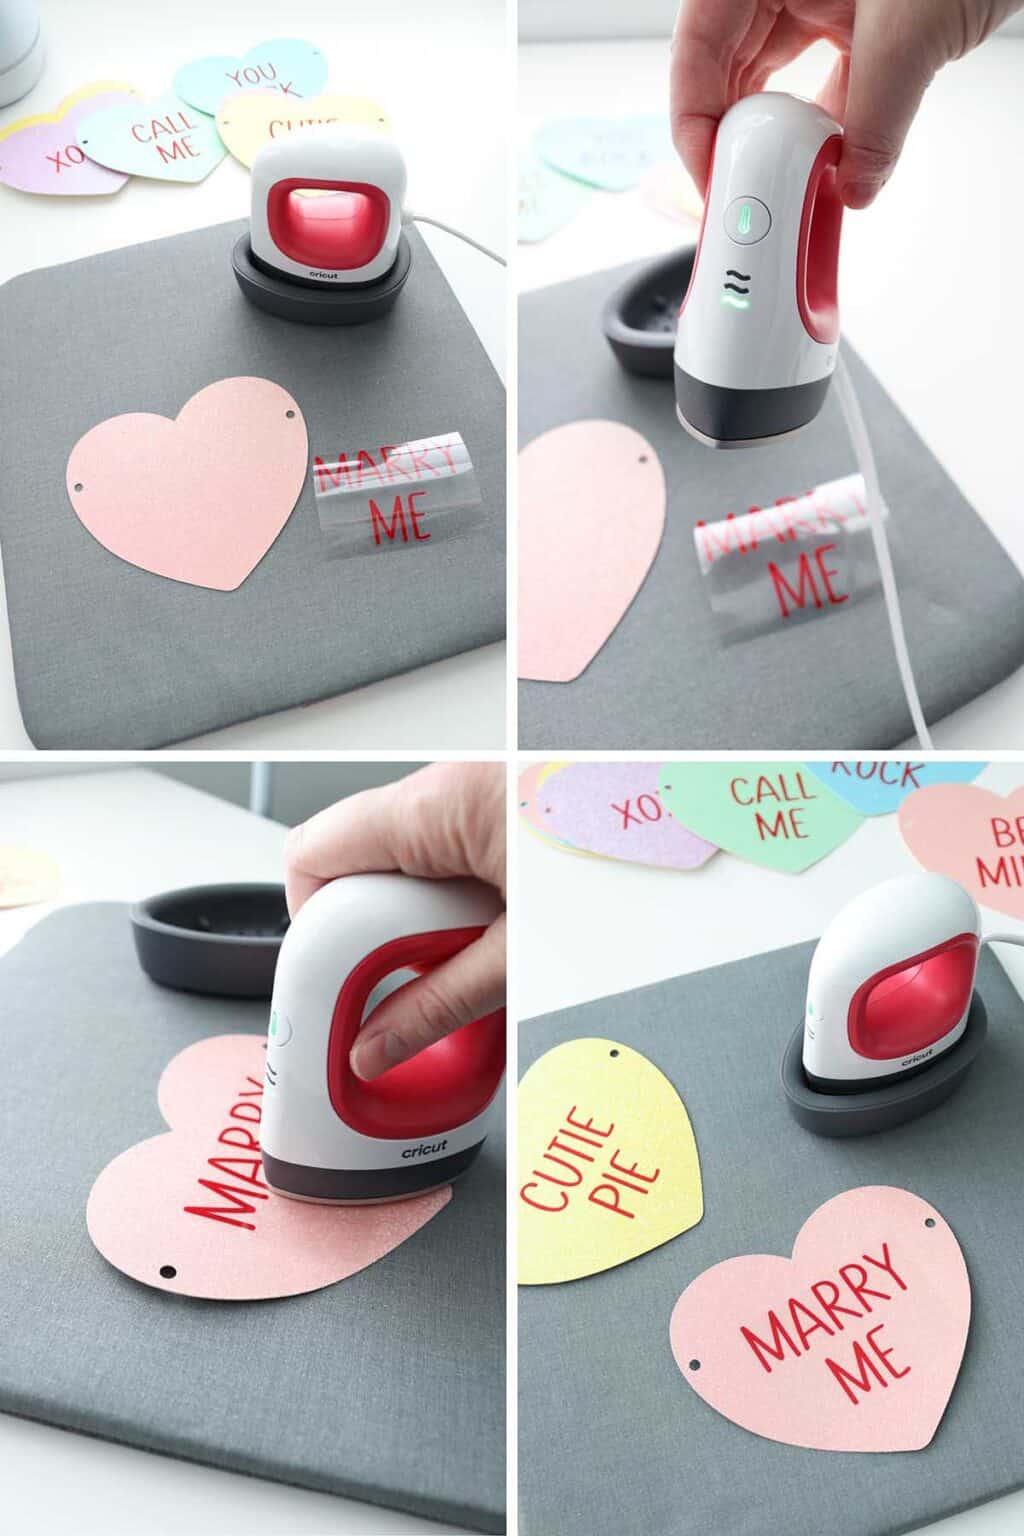
Image credit: @aubreeoriginals.com
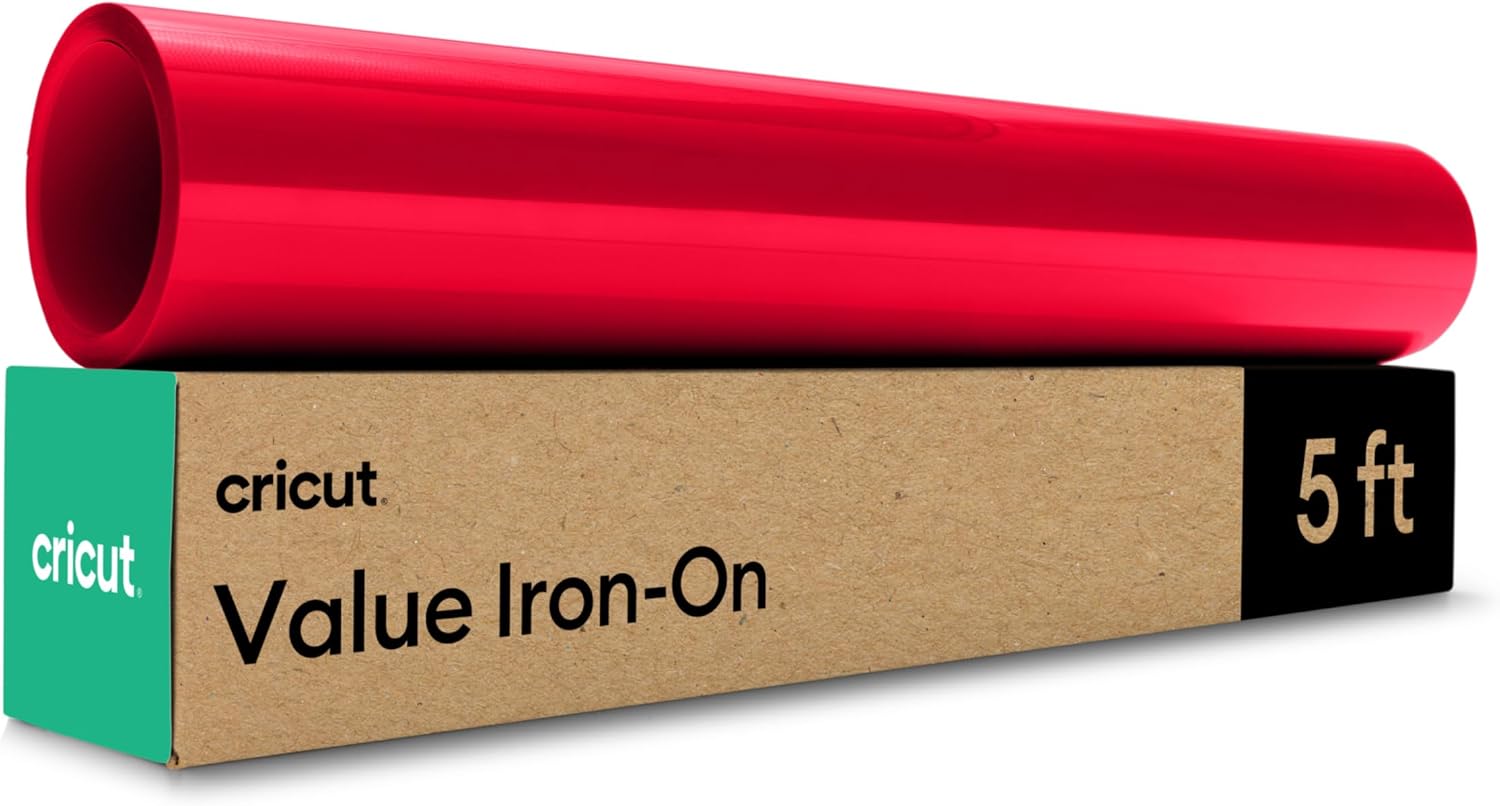
Amazon Find: Red Heat-Transfer Vinyl for Craft Projects
Red iron-on vinyl can create crisp lettering on compatible craft surfaces. Confirm that the vinyl, cardstock, and heat settings are suitable for one another before pressing.
6. Thread the Hearts Onto Ribbon or Yarn
Now it’s time to turn your individual hearts into a festive garland. White yarn creates a soft, simple look, while narrow ribbon gives the banner a more decorative finish. You can thread the hearts along one continuous length of cord or connect each pair with small ribbon bows.
For a continuous banner, thread the string down through one hole and back up through the other, repeating the same pattern for every heart. Leave extra cord at both ends for hanging. If you prefer ribbon bows between the hearts, cut short ribbon pieces and connect neighboring hearts through their side holes, tying each connection into a small bow. Lay the entire banner flat afterward and adjust the spacing so the hearts hang evenly. Choose mounting hooks that are suitable for your wall or mantel surface and the finished decoration’s weight.
Finishing tip: Avoid pulling the string too tightly. A little flexibility helps the hearts hang naturally and reduces tearing around the holes. Keep the banner away from open flames, heat sources, and areas where loose cords could create hazards.
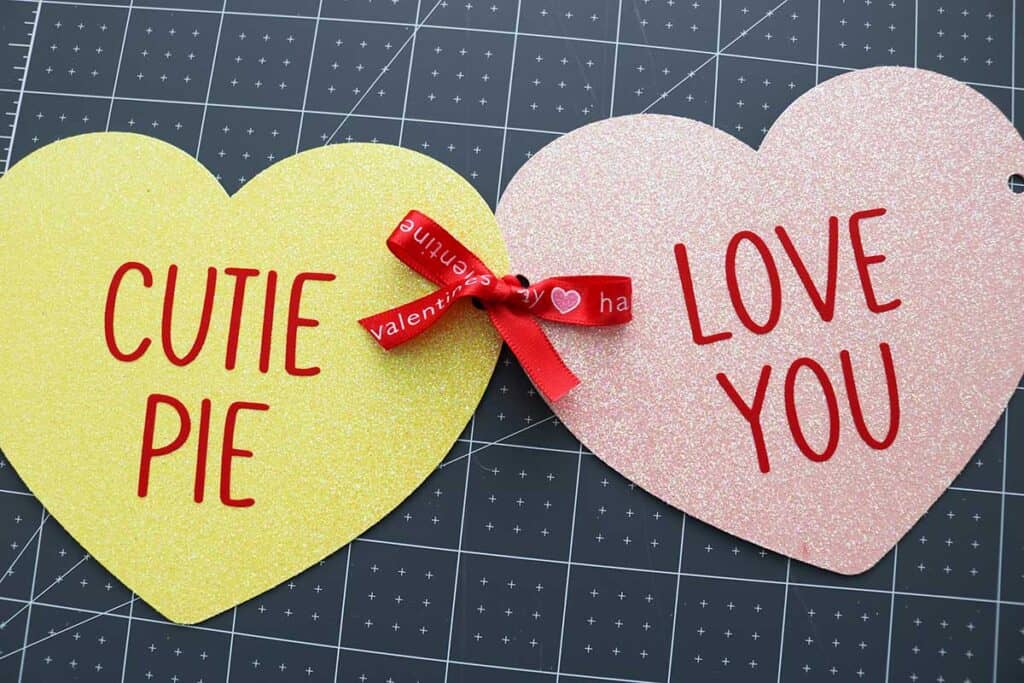
Image credit: @aubreeoriginals.com
Method 2: How to Make a Soft Felt Conversation Heart Banner
A felt conversation heart banner creates a softer, more dimensional version of the same candy-inspired decoration. This no-sew method uses pairs of felt hearts with a string secured between the layers. Dimensional fabric paint adds the messages, giving the letters a slightly raised texture. It’s a lovely choice if you want a handmade garland that can be stored and reused for future Valentine’s celebrations.
7. Choose Felt Colors and Prepare a Heart Template
Start by choosing felt sheets in colors inspired by conversation heart candy. Pale pink, mint, yellow, lilac, peach, and light blue look beautiful together. You can use traditional Valentine’s colors or create a softer arrangement that matches your everyday home decor. The felt should be sturdy enough to keep its shape but flexible enough to cut neatly.
Draw a heart approximately four inches wide on a piece of cardboard. Keep the two rounded top sections balanced and make the lower point softly tapered. Cut out the template and test it on one felt sheet before preparing the remaining hearts. If the shape looks too narrow for lettering, widen the center slightly. A broad heart with a generous middle area gives you more space for the short painted messages.
Budget tip: Use regular craft felt sheets rather than expensive specialty fabric. If you have leftover felt from another project, mix the available pastel shades for a playful handmade look.
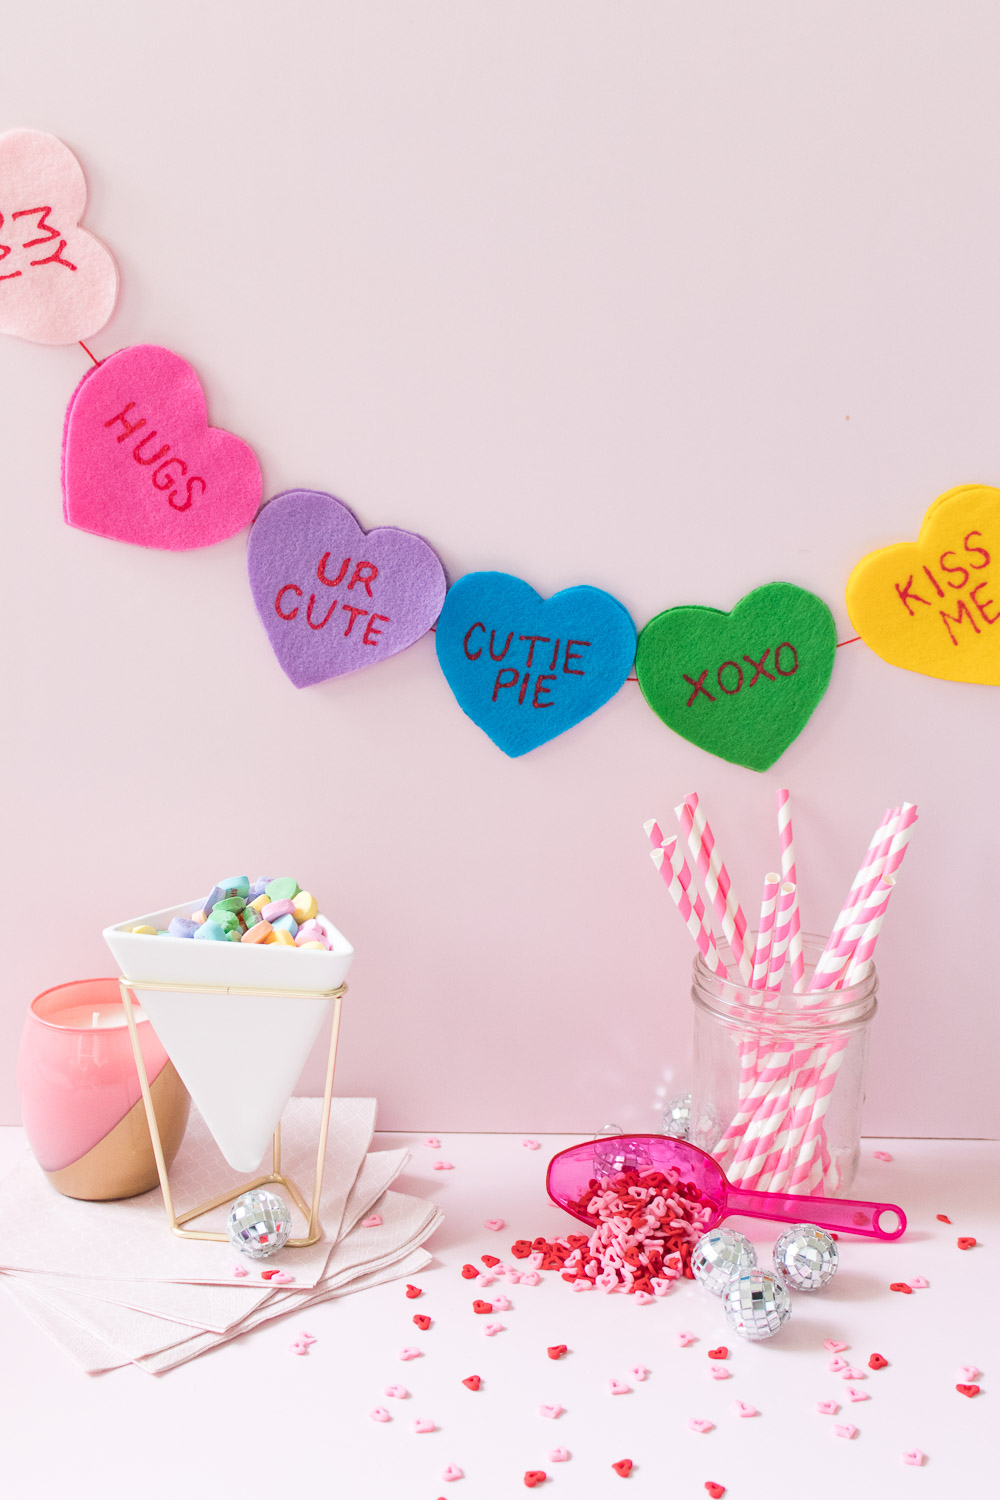
Image credit: @clubcrafted.com
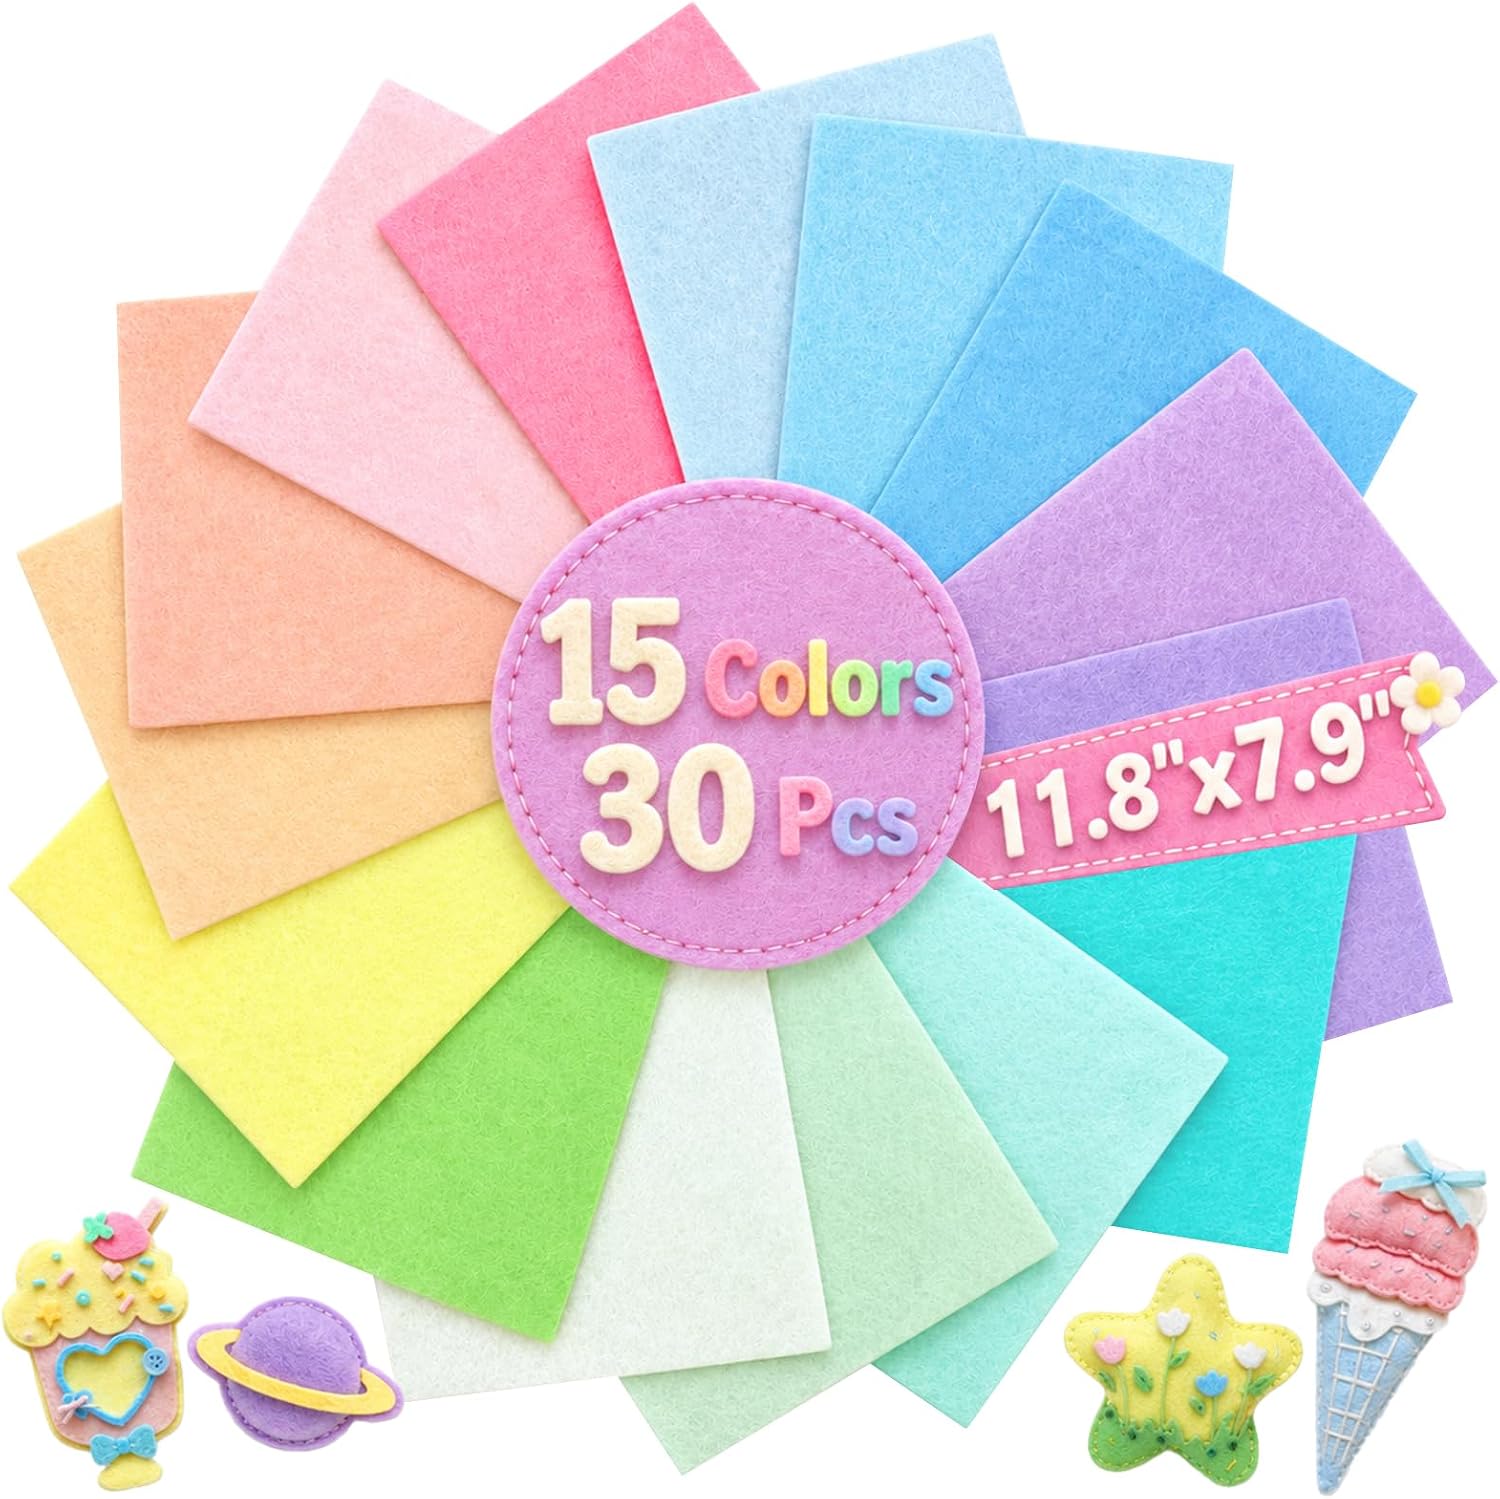
Amazon Find: Pastel Craft Felt Sheets
Pastel felt sheets are useful for making soft conversation hearts, seasonal garlands, and other Valentine’s decorations. Choose sheets large enough to cut pairs of matching hearts.
8. Cut Matching Felt Heart Pieces
Each finished felt heart needs two matching pieces: one for the front and one for the back. This layered construction hides the hanging string inside the decoration and helps the banner feel more durable. Cutting each pair carefully also gives the finished hearts smooth, consistent edges.
Fold one felt sheet in half, place your heart template on top, and trace around it lightly if needed. Cut through both layers to create two matching hearts. Repeat for each color until you have enough pairs for your intended banner length. Use sharp fabric scissors and work slowly around the curved edges. For a longer banner, prepare several pairs in each color and stack them together in their matching sets.
DIY tip: Keep the front and back pieces together as you cut. This makes assembly easier and helps prevent accidentally gluing two different shapes together.
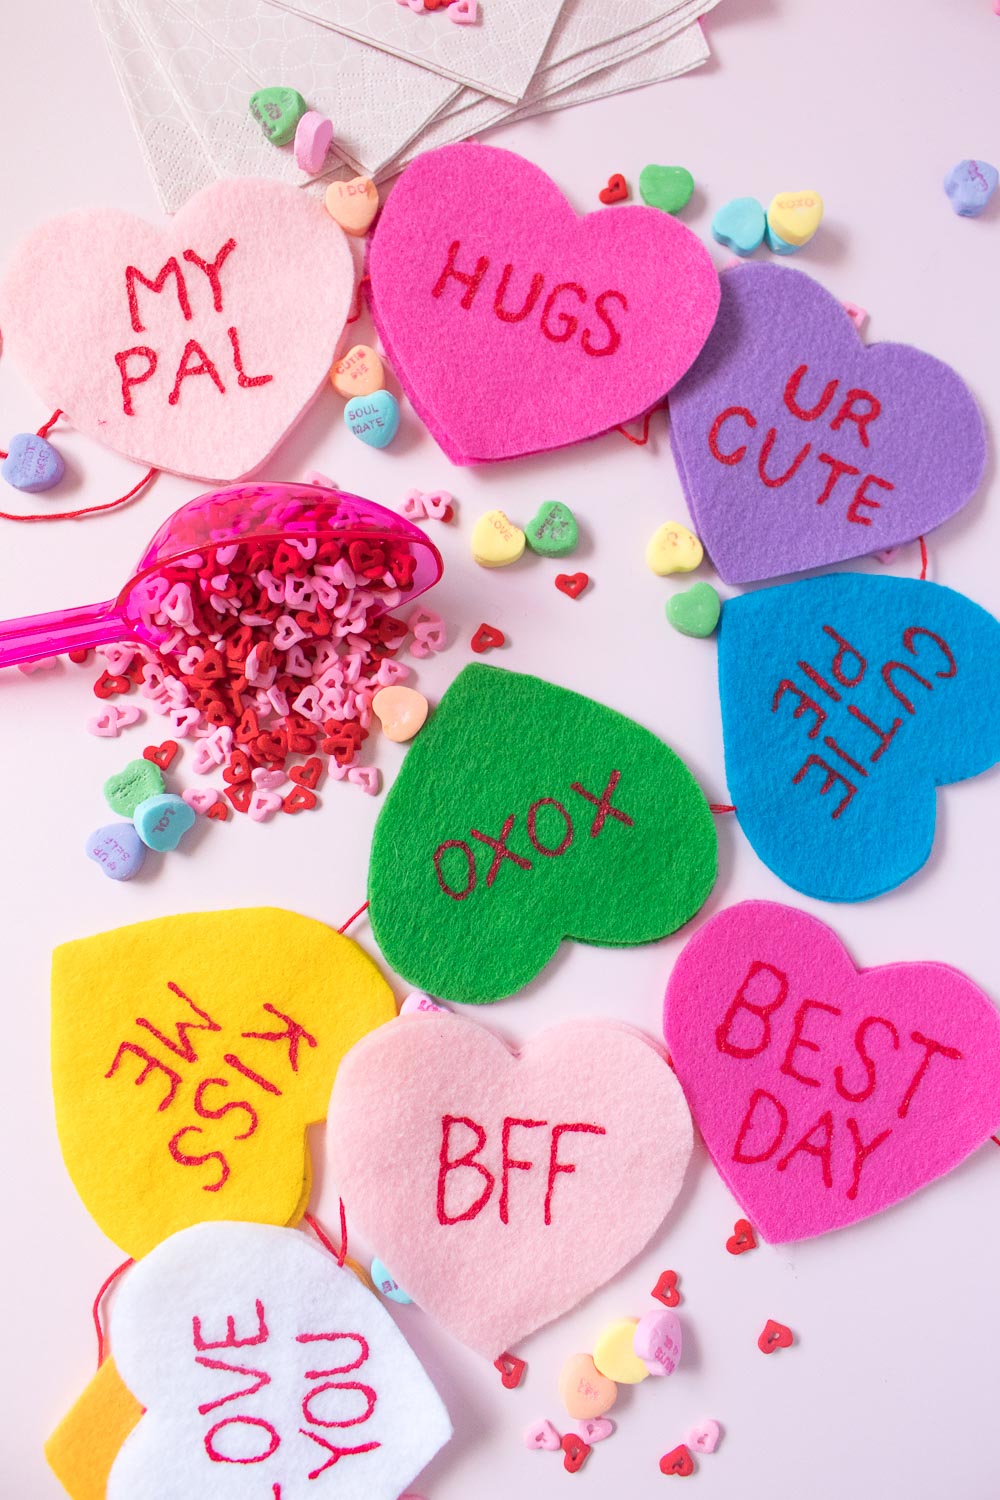
Image credit: @clubcrafted.com
9. Lay Out the Felt Hearts in Your Preferred Sequence
Before using any glue, arrange the felt hearts in a row across your table. Seeing the entire banner laid out helps you decide on color placement and ensures the garland will look balanced when hanging. This step is especially useful if you’re mixing more than four pastel shades.
Place the front pieces in a repeated color order, such as pink, yellow, mint, lavender, and peach. Position the matching back pieces underneath or just above each front so they’re easy to reach during assembly. Run a length of string across the row to estimate the overall banner width. Leave a little space between hearts so they can hang independently. Make sure the finished length fits your intended wall, mantel, or party display before cutting the cord.
Styling tip: For a softer arrangement, repeat pastel colors rather than placing every shade randomly. A consistent sequence gives the banner a more coordinated appearance.
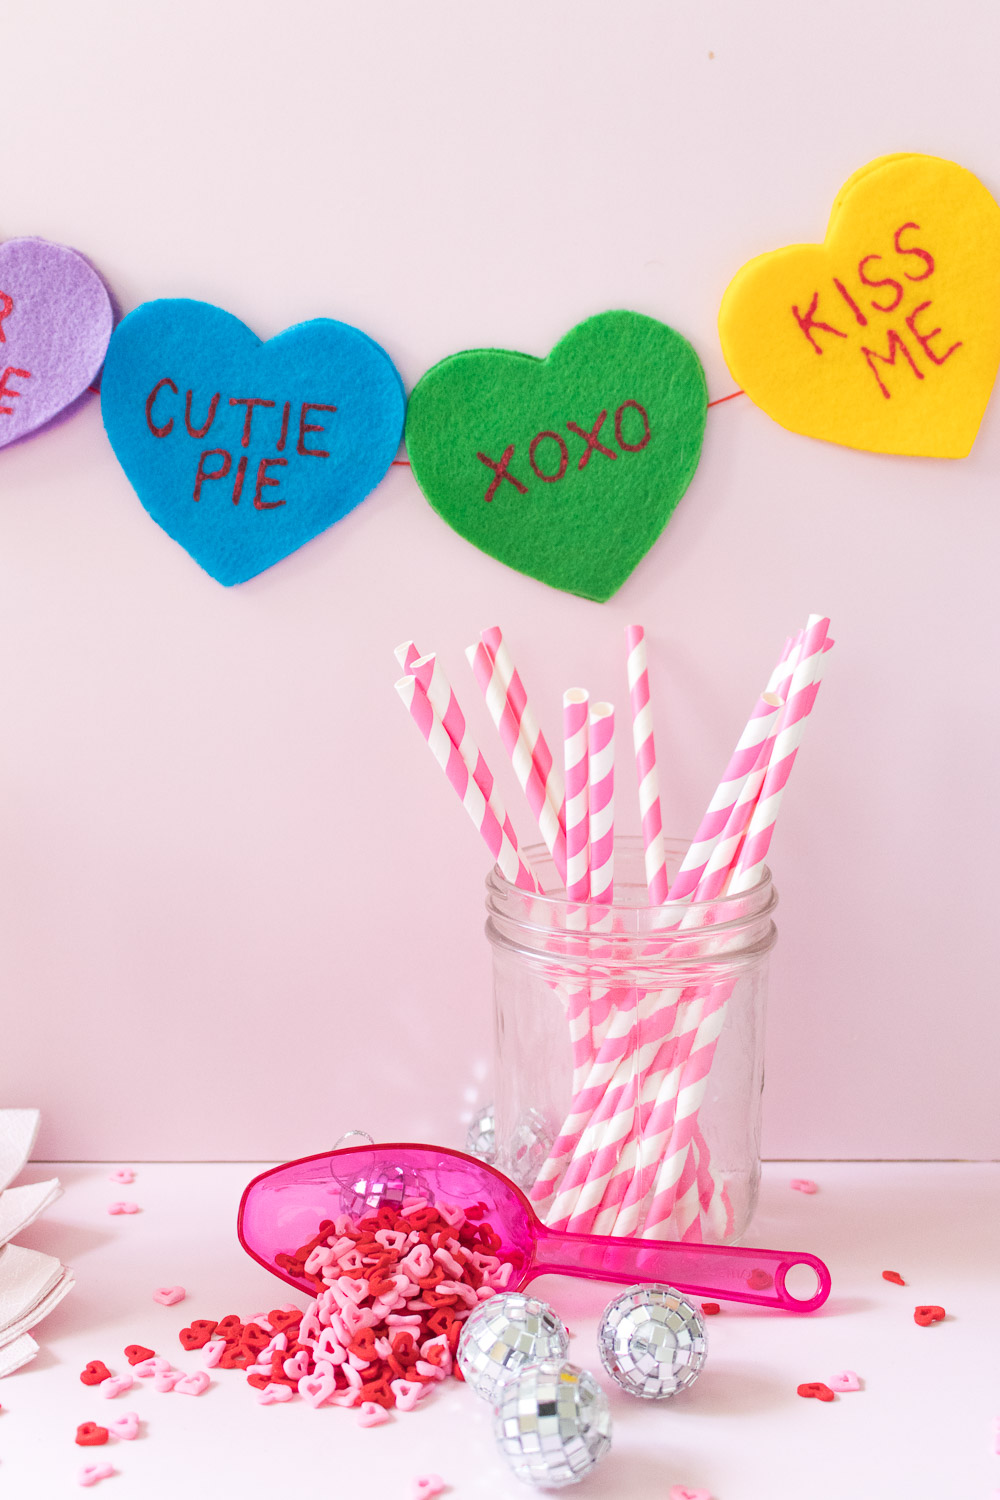
Image credit: @clubcrafted.com
10. Attach the String Between the Felt Layers
The felt version doesn’t require punched holes because the hanging string can be hidden between the front and back layers of each heart. This technique creates a neat finish and allows the hearts to sit naturally along the banner. Using fabric glue also means you don’t need to sew each piece together.
Lay the back heart pieces flat and apply a short line of fabric glue across the upper middle area of each one. Position the string along that glue line, keeping it reasonably straight. Add a thin line of fabric glue around the inside edge of each felt heart, then place the matching front piece on top. Press gently to secure the layers without pushing excessive glue out around the edges. Continue along the banner, checking the spacing as you work. Let the adhesive set according to its instructions before lifting the garland.
Practical tip: Leave enough unused cord at both ends for hanging. Don’t use too much glue, as it may soak through thin felt and create visible stiff patches.
Amazon Find: Fabric Glue for Felt Craft Projects
A suitable fabric adhesive helps attach felt layers and secure the string inside each heart. Check that the glue is designed for felt and dries with the flexibility you need.
11. Paint Conversation Heart Messages on the Felt
Dimensional fabric paint gives the felt hearts their candy-inspired messages while adding a slightly raised finish. Traditional conversation heart phrases look lovely in red, but you can also choose dark pink or another contrasting shade that is easy to read against the pastel felt.
Practice a few short words on scrap paper or leftover felt before decorating the finished banner. Position each heart flat on a protected work surface and lightly plan where the letters will go. Start near the center of the phrase so the finished lettering doesn’t drift too far to one side. Apply the paint slowly using the bottle’s fine tip, keeping the letters large and relatively simple. Short phrases such as HUG ME, BE MINE, XOXO, and LOVE YOU fit naturally within a four-inch heart. Avoid touching the paint while it’s wet.
Lettering tip: Test how the paint flows before working on your first heart. The paint may come out faster than expected, and practicing can help prevent thick, uneven letters.
Amazon Find: Red Dimensional Fabric Paint
Dimensional fabric paint can create raised conversation heart lettering on felt. A fine-tip applicator makes short words and simple lettering easier to control.
12. Let the Banner Dry and Hang It for Valentine’s Day
The final step is giving the felt hearts enough time to dry completely before hanging the banner. Dimensional paint can feel dry on the surface before the thicker lettering underneath has fully cured, so moving the garland too soon may cause smudges or flattened letters.
Leave the finished hearts flat in a clean, protected area and follow the fabric paint manufacturer’s drying instructions. Allow extra time if the lettering is thick or your room is humid. Once everything is dry, lift the banner carefully and check that each heart is securely attached to the cord. Adjust the spacing and hang it from suitable removable hooks or another stable support. A mantel, bookshelf, bedroom wall, or Valentine’s dessert table makes a charming display location.
Finishing tip: If a heart hangs at an angle, adjust its position along the string or reinforce the attachment with a small amount of suitable fabric glue. Let any repairs dry before displaying the banner.
Cute Conversation Heart Sayings for Your Valentine’s Banner
Short messages work best because they fit comfortably inside the heart shapes and can be read from across the room. You can use traditional candy-inspired sayings or create your own romantic and friendship-themed phrases.
| Classic Romantic | Cute and Playful | Friendship and Family |
|---|---|---|
| BE MINE | CUTIE PIE | BESTIES |
| LOVE YOU | SWEET PEA | YOU ROCK |
| KISS ME | HEY YOU | BFF |
| XOXO | SO CUTE | BE KIND |
| HUG ME | HI LOVE | YOU SHINE |
| MY LOVE | OH SWEET | BIG HUGS |
| TRUE LOVE | SO SWEET | GOOD VIBES |
For a classic conversation candy appearance, keep the lettering uppercase and centered. If you’re making a banner for a classroom, family gathering, or Galentine’s party, friendship and kindness messages may be more suitable than romantic phrases.
How to Decorate With Your Conversation Heart Banner
Once you’ve finished your handmade banner, you can display it in several places around your home. The pastel colors work beautifully with simple Valentine’s decorations, soft flowers, and neutral everyday accessories.
- Fireplace mantel: Drape the banner across an unused mantel and add two small vases of pink or cream flowers. Keep all decorations outside fireplace heat and flame clearances.
- Valentine’s dessert table: Hang a cardstock banner on the wall behind a candy or cupcake display for a coordinated party backdrop.
- Bedroom wall: Display the felt banner above a dresser or shelf with a framed photograph and small decorative heart.
- Galentine’s gathering: Use playful messages and pink, lilac, and peach hearts to decorate a snack or photo area.
- Kids’ playroom: Choose cheerful friendship phrases and attach the banner securely well out of young children’s reach.
- Entryway console: Hang a short six-heart banner above a small Valentine vignette with flowers and a framed print.
- Bookshelf: Drape a lightweight banner across a suitable shelf, keeping it away from lamps, candles, and unstable objects.
- DIY photo backdrop: Layer the banner over a plain paper backdrop for an easy Valentine’s photo corner, securing all decorations appropriately.
How to Make Your Conversation Heart Banner Look More Professional
Small details can make a big difference in a handmade banner. Focus on consistent shapes, easy-to-read messages, and careful assembly rather than adding too many extra decorations.
- Use a single template: Matching heart shapes create a tidy, coordinated appearance.
- Keep messages short: Two or three words are usually easier to fit neatly inside a small heart.
- Choose contrasting lettering: Red lettering stands out beautifully against pale candy-inspired colors.
- Repeat colors: An organized color pattern makes a longer banner feel balanced.
- Space hearts evenly: Leave enough room for each piece to hang without covering its neighbor.
- Test materials first: Check vinyl adhesion, heat compatibility, and paint flow on spare materials.
- Finish the edges neatly: Trim loose fibers and rough cardstock edges before assembling the banner.
- Let paint and glue dry fully: Proper drying helps prevent smudges and weak attachments.
DIY Conversation Heart Banner Shopping Checklist
You can make a beautiful conversation heart banner without buying every supply on this list. Choose either the cardstock or felt method and reuse materials you already own whenever possible.
| Supply | Best For | Priority |
|---|---|---|
| Pastel Cardstock | Cardstock Hearts | Essential for Method 1 |
| Glitter Cardstock | Sparkling Heart Finish | Optional |
| Red Lettering Material | Cardstock Messages | Essential for Method 1 |
| Cutting Machine | Consistent Paper Shapes and Vinyl | Optional |
| Scissors and Heart Template | Hand-Cutting Hearts | Essential for No-Machine Method |
| Pastel Craft Felt | Felt Hearts | Essential for Method 2 |
| Fabric Glue | Securing Felt Layers | Essential for Method 2 |
| Dimensional Fabric Paint | Raised Felt Lettering | Essential for Method 2 |
| Yarn, Ribbon, or String | Hanging Both Banner Styles | Essential |
| Removable Hanging Hooks | Display Installation | As Needed |
Common Conversation Heart Banner Mistakes to Avoid
Using Adhesive Vinyl on Textured Glitter Cardstock
Ordinary adhesive vinyl may not grip glitter cardstock securely because of its textured surface. Use smooth cardstock with compatible adhesive vinyl, or test an appropriate heat-transfer material on glitter cardstock before completing the full project. Don’t assume every paper and vinyl combination works the same way.
Making the Messages Too Long
Conversation hearts look best with short, bold messages. Long sentences may require lettering so small that the words become difficult to read. Choose phrases such as HUG ME, XOXO, BE MINE, or CUTIE PIE rather than lengthy romantic quotes.
Using Too Much Fabric Glue
Excess glue can soak through felt, create stiff patches, or appear around the edges of the hearts. Use thin, controlled lines of adhesive and press the layers together gently. Let the glue dry fully before lifting the finished banner.
Rushing the Fabric Paint Drying Time
Raised fabric paint may require more drying time than ordinary markers. Hanging the felt hearts too early can cause smudges or flattened lettering. Follow the product instructions and keep the pieces flat until the paint is ready to handle.
Hanging the Banner Near Heat or Open Flames
Paper, felt, yarn, and ribbon can burn when exposed to heat or flames. Keep the banner away from active fireplaces, candles, heaters, and hot light fixtures. Make sure it doesn’t obstruct doorways or hang where small children or pets can pull on the string.
Frequently Asked Questions
1. What Is the Easiest Way to Make a Conversation Heart Banner?
The easiest method is to cut matching hearts from smooth pastel cardstock, write short phrases with a red marker, punch two holes in each heart, and thread them onto yarn. You don’t need a cutting machine, fabric paint, or heat-transfer equipment for this simple version.
2. Can I Make a Conversation Heart Banner Without Cricut?
Yes. Use a cardboard template and scissors to cut the hearts by hand. Add the messages with a paint marker or craft pen, then connect the hearts with ribbon or string. The felt method also works without a cutting machine and requires only basic craft supplies.
3. What Size Should Conversation Hearts Be for a Banner?
Hearts around four inches wide are a practical starting point for a mantel or wall banner. Make them smaller for narrow shelves or larger for a party backdrop. The important thing is leaving enough room for clear lettering and appropriate spacing between the hearts.
4. What Kind of Paint Works Best on Felt Conversation Hearts?
Dimensional fabric paint with a fine writing tip works well for raised lettering on felt. Choose a color that contrasts with the felt, practice on a scrap piece, and allow the finished writing to dry fully according to the manufacturer’s directions.
5. Can I Reuse a Conversation Heart Banner Every Valentine’s Day?
Yes. Both cardstock and felt banners can be reused with proper care. Store cardstock hearts flat between protective sheets and fold felt garlands loosely to prevent damage. Keep everything dry and away from excessive heat, moisture, and direct pressure during storage.
Recommended Finds on Amazon
These reusable craft supplies can help you make a conversation heart banner and other Valentine’s decorations. Choose only the materials required for your preferred method.
- Pastel Glitter Cardstock: Create colorful conversation hearts with a sparkling paper finish.
- Pastel Craft Felt Sheets: Make soft, layered hearts for a reusable no-sew banner.
- Red Dimensional Fabric Paint: Add raised candy-inspired lettering to felt hearts using a fine-tip applicator.
Final Thoughts
Learning how to make a conversation heart banner for Valentine’s Day is a fun way to create charming decorations using basic craft materials. The pastel cardstock version offers crisp lettering and colorful paper hearts, while the felt version provides a soft, textured garland that can be reused for future celebrations.
Choose the method that suits the supplies you already own, start with six to eight hearts, and use short messages that feel personal to your celebration. Once finished, hang your handmade banner above a mantel, shelf, or Valentine’s party display for a cheerful decoration inspired by classic conversation heart candies.